

EriChan wrote: ↑23 Sep 2026, 17:14
The model shows as "---" because Steps 7 and 8 were skipped during the update. The first boot flashes the BIOS, while the second USB boot automatically writes the model information.
To fix it:
1. Power off, remove all drives, insert the BIOS update USB, and connect a monitor and keyboard.
2. Power on and tap Del or Esc to enter the BIOS.
3. Go to Save & Exit, select the BIOS update USB device (the UEFI entry), and press Enter.
4. Wait for the script to finish writing the model info, then remove the USB.
5. Reinstall your drives and boot into TOS. The model will now display correctly.
Please try these steps and let us know how it goes. Looking forward to your feedback!
How to Properly Install and Use TOS 7 on the 424 Series TNAS
Re: How to Properly Install and Use TOS 7 on the 424 Series TNAS
Done. Thanks!


Re: How to Properly Install and Use TOS 7 on the 424 Series TNAS
C'est Ok pour moi... Désolé, je pensais ces étapes optionnelles lorsque l'on choisissait bien la bonne clef USB de mise à jour... De plus, vu que j'avais un message de succès de la mise à jour, j'ai pensé que tout était terminé.
Bravo à vous et merci, bien que cela ne semblait pas avoir d'incidence pour moi.

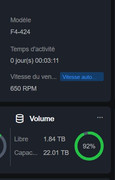
 F4-424

Re: How to Properly Install and Use TOS 7 on the 424 Series TNAS
Thanks for the guide. I had a similar boot issue before and didn’t realize the BIOS version could be the cause. This was helpful.