Fault Symptoms:
After installing a third-party operating system or updating to TOS7, abnormal behaviors may occur, such as failing to boot properly after installing Proxmox, or the system repeatedly restarting automatically.
Cause:
The F8 SSD / F8 SSD Plus has compatibility issues with certain third-party systems. To resolve this, the motherboard BIOS and the PCIe expansion chip (ASM2806) firmware (FW) need to be updated.
Solution
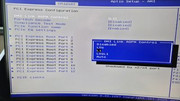
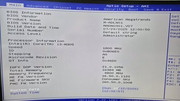
1. Check the current BIOS version of the motherboard.
If it is MADN0301.V07 or higher, no update is required.
If it is lower, please refer to Steps > BIOS Upgrade Steps below for updating.

2. Check the firmware (FW) version of the motherboard PCIe expansion chip (ASM2806).
The required version is 24082140-0000.
Checking method:
1.Download the following files and upload them to the NAS shared folder (e.g., /Volume1/public/), as shown below:
https://download2.terra-master.com/240821_40_00_00.bin
https://download2.terra-master.com/218xfwdl

3.Refer to this guide to log into the terminal: viewtopic.php?t=2350
Then execute the following commands one by one:
Code: Select all
cd /Volume1/public/Code: Select all
chmod 755 218xfwdlCode: Select all
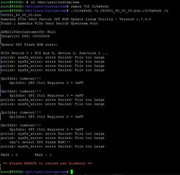
./218xfwdl /sIf it shows a lower version (e.g., 17 11 01 40 00 00), please proceed to Steps > PCIe Expansion Chip (ASM2806) Firmware Upgrade Steps below.

Steps
A. BIOS Upgrade Steps
1.Power off the NAS, remove all M.2 SSDs and the TOS boot USB drive from the motherboard.
2.Prepare a FAT32-formatted USB drive, download the BIOS upgrade package, and unzip it:
F8 SSD download link: https://download2.terra-master.com/F8_S ... 01.V07.zip
F8 SSD Plus download link: https://download2.terra-master.com/F8_S ... 01.V07.zip
Copy all extracted files to the root directory of the USB drive.

3.Insert the USB drive and start the NAS. The system will automatically complete the BIOS upgrade and reboot.


4.Restart the NAS again. The motherboard information will be automatically written. Once the device reboots again, the BIOS upgrade is complete.
5.After the BIOS upgrade is complete, remove the USB drive.
Notes:
Ensure the power supply to the NAS is stable during the upgrade; do not power off.
Do not remove the USB drive, press keyboard keys, or plug/unplug the power during the upgrade.
The entire process is automatic. Please wait patiently.
B. PCIe Expansion Chip (ASM2806) Firmware Upgrade Steps
1.Download the following files and upload them to the NAS shared folder (e.g., /Volume1/public/):
https://download2.terra-master.com/240821_40_00_00.bin
https://download2.terra-master.com/218xfwdl
2.Refer to this guide to log into the terminal: viewtopic.php?t=2350
Then execute the following commands:
Code: Select all
cd /Volume1/public/Code: Select all
chmod 755 218xfwdlCode: Select all
./218xfwdl /u 240821_40_00_00.bin
3.Restart the NAS, log back into the terminal, and run the following again to verify:
Code: Select all
cd /Volume1/public/Code: Select all
./218xfwdl /supgraded to “24 08 21 40 00 00”, as shown in the figure.
At this point, the PCIe expansion chip (ASM2806) firmware has been successfully upgraded.