All versions
Applicable models:
All TNAS models
Scenario 1:Mount the shared folder on another TNAS device locally on TNAS
Operation guide:
In order to enhance the convenience of data access and realize file synchronization and file migration between two TNAS devices, you can mount the shared folder located on another TNAS to the local TNAS. For specific operations, please refer to the following guidelines.
Operation steps:
Method 1: Mount using the SMB protocol
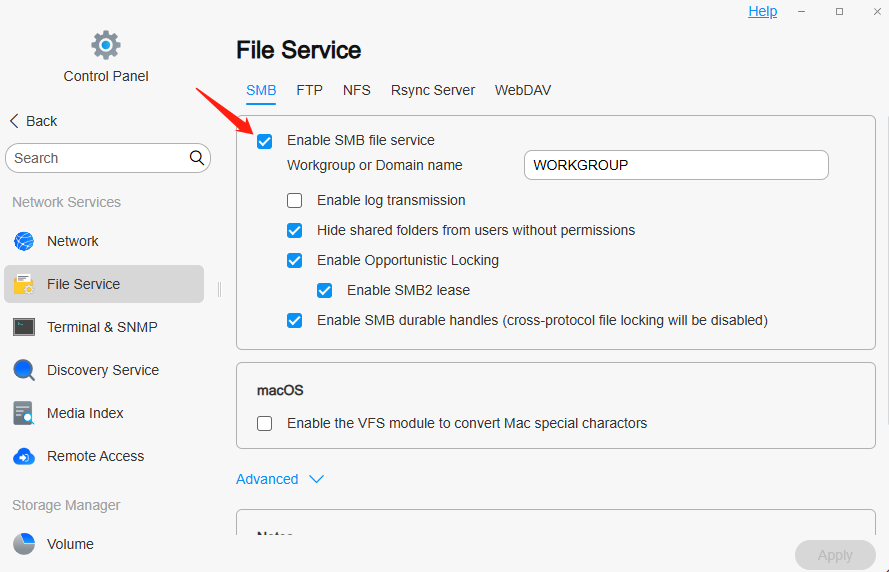
1. Enable the SMB protocol on the source TNAS_A:
· Go to the "Control Panel" > "File Service" of the source TNAS_A, find and enable the SMB file protocol.
2. Mount the remote folder on the target TNAS_B:
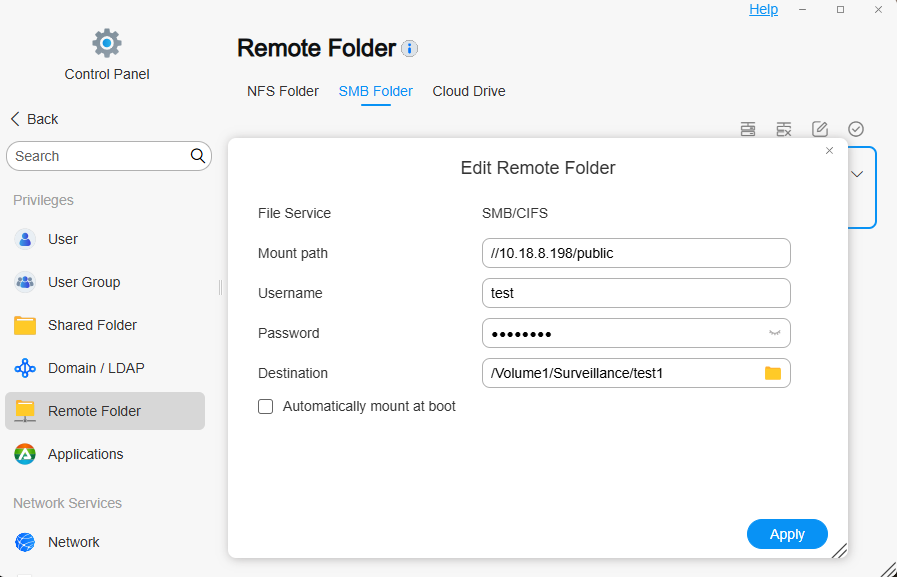
· Go to the target TNAS_B's "Control Panel" > "Remote Folder" > "SMB Folder".
· Click "Mount". In the pop-up window, fill in the source TNAS_A's mount path, username and password, and select a mount destination, which is an empty folder on the target TNAS_B to mount the source TNAS_A's shared folder.
· Finally, click "Apply" > "Enable" to complete the mount.
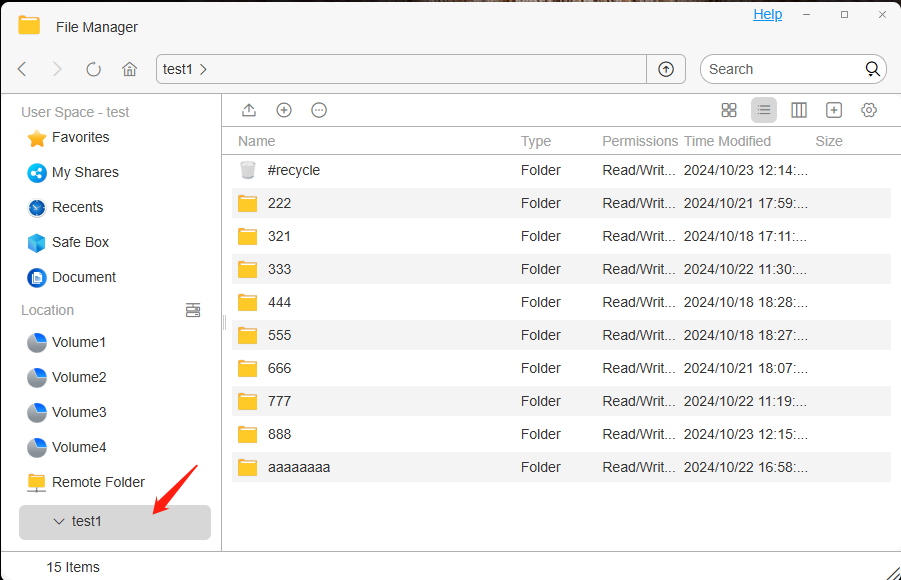
3. Access the mounted folder:
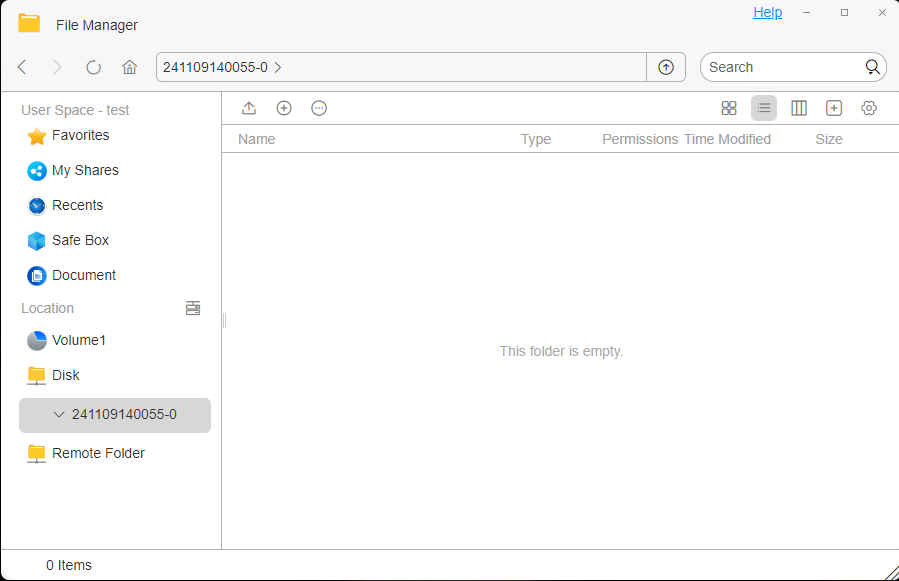
· After mounting successfully, you can see the mounted directory in "File Manager" on the target TNAS_B.
· Copy the files or folders to be migrated from the mounted directory to the target location.
Method 2: Mount using the NFS protocol
1.Enable NFS protocol on the source TNAS_A:
· Go to "Control Panel" > "File Service" on the source TNAS_A, find and enable NFS file protocol.

2.Set the IP address allowed to be accessed on the source TNAS_A (that is, the IP address of the target TNAS_B):
· Go to the "Control Panel" > "Shared Folder" of the source TNAS_A, click "Edit" shared folder, and create NFS rules to allow the target TNAS_B to access the shared folder.
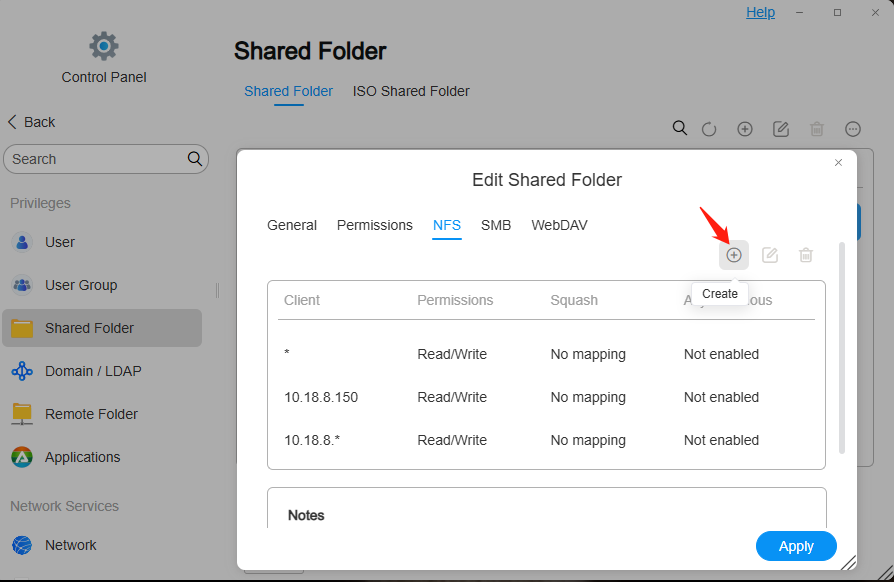
3.Mount the remote folder on the target TNAS_B:
· Go to the target TNAS_B's "Control Panel" > "Remote Folder" > "NFS Folder".
· Click "Mount". In the pop-up window, fill in the source TNAS_A's mount path, select the NFS version and protocol, and then select a mount destination, which is an empty folder on the target TNAS_B to mount the source TNAS_A's shared folder.
· Finally, click "Apply" > "Enable" to complete the mount.
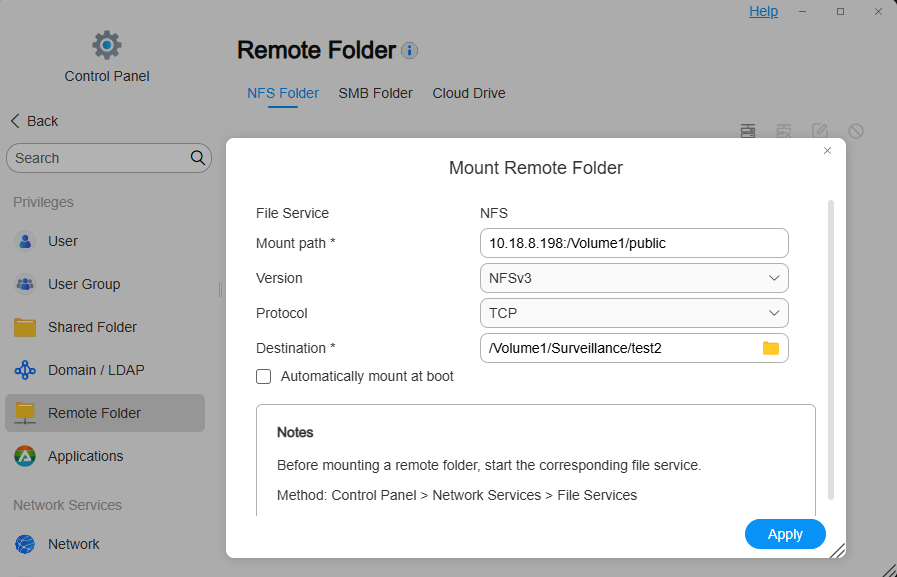
4. Access the mounted folder:
· After mounting successfully, you can see the mounted directory in "File Manager" on the target TNAS_B.
· Copy the files or folders to be migrated from the mounted directory to the target location.

Method 3: Mount using the WebDAV protocol
1.Enable the WebDAV protocol on the source TNAS_A:
· Go to the "Control Panel" > "File Service" of the source TNAS_A, find and enable the WebDAV file protocol.
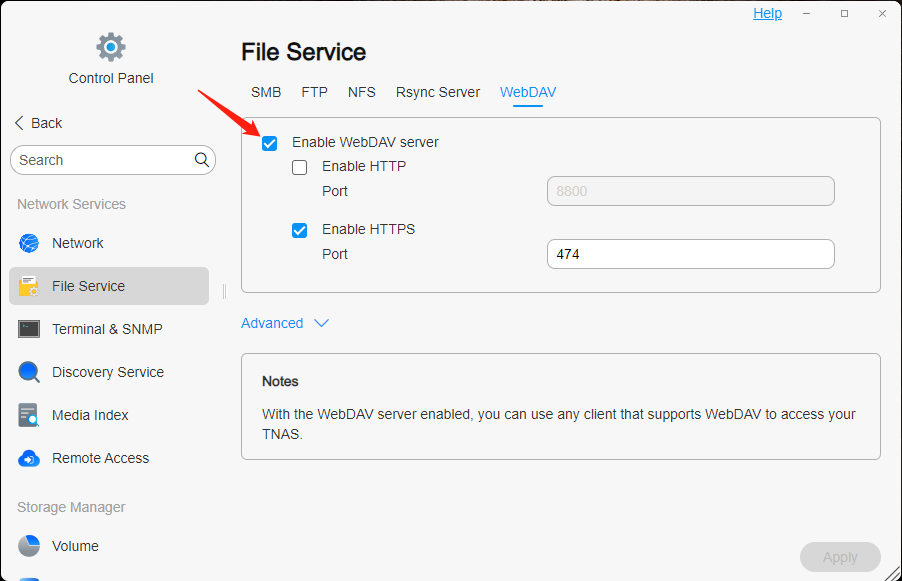
2.Mount the remote folder on the target TNAS_B:
· Go to the target TNAS_B's "Control Panel" > "Remote Folder" > "Cloud Drive".
· Click "Mount". In the pop-up window, select the WebDAV cloud service provider, customize the name, fill in the source TNAS_A's mount path, username and password, click Next, select the cloud disk directory to be mounted, and specify the mount destination, which is an empty folder on the target TNAS_B.
· Finally, click "Apply" > "Enable" to complete the mount.

3. Access the mounted folder:
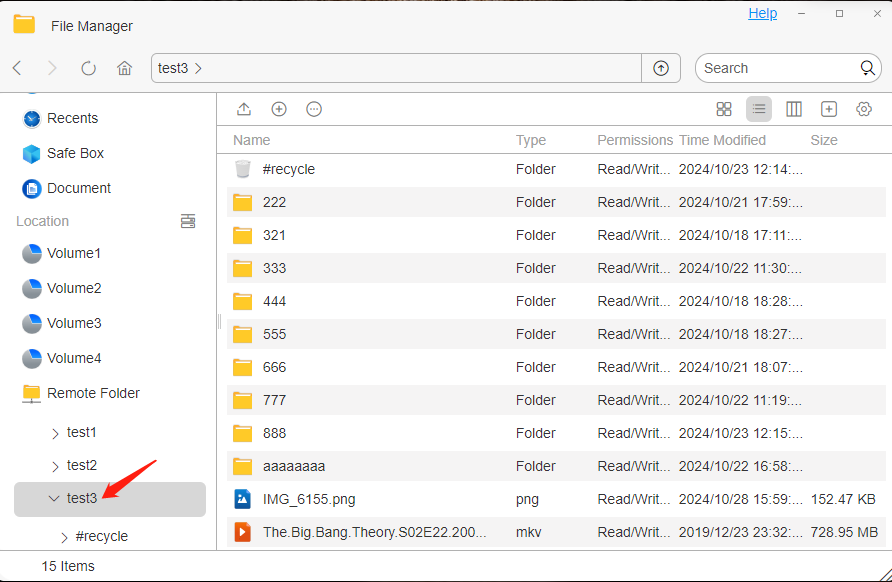
· After mounting successfully, you can see the mounted directory in "File Manager" on the target TNAS_B.
· Copy the files or folders to be migrated from the mounted directory to the target location.
Scenario 2:Use the iSCSI protocol to mount the storage space of another TNAS device on the local TNAS
Operation Guide:
Using the iSCSI protocol, users can mount the storage space of another TNAS device to the local TNAS, achieving flexible expansion and efficient use of storage resources.
Operation steps:
1.Configure iSCSI on the source TNAS_A:
· Install the iSCSI Manager application in the “APP Center” of the TOS system, and create iSCSI Target and iSCSI LUN.


2.Mount iSCSI on the target TNAS_B:
· Go to the target TNAS_B's "Control Panel" > "Storage Manager" > "Virtual Disk".
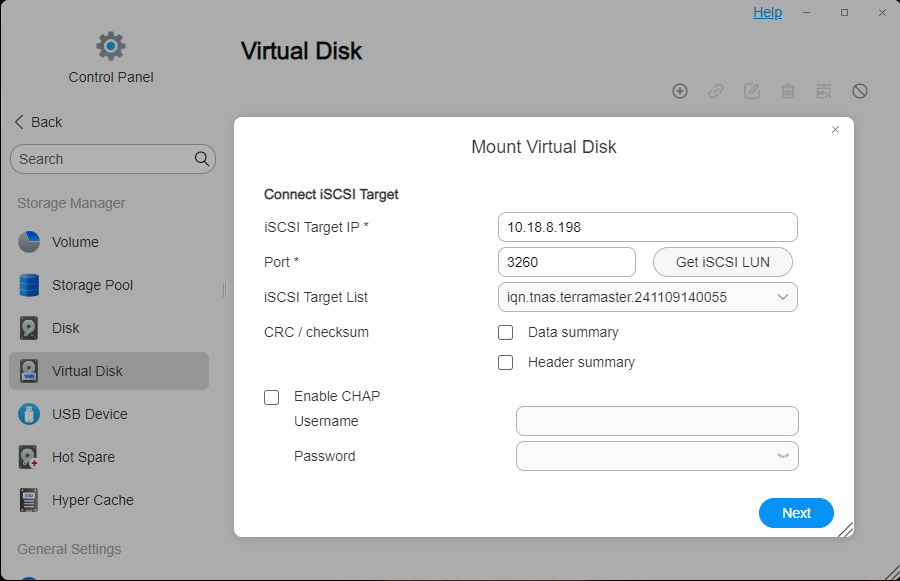
· Click "Mount", enter the server IP address where the iSCSI Target is located and its communication port (the default port is: 3260), and then click "Get iSCSI LUN". If password authentication is required, please enter the username and password. You can optionally enable “Data Digest” or “Header Digest”, which are verification items for the iSCSI initiator connecting to the iSCSI Target. Then click "Next".
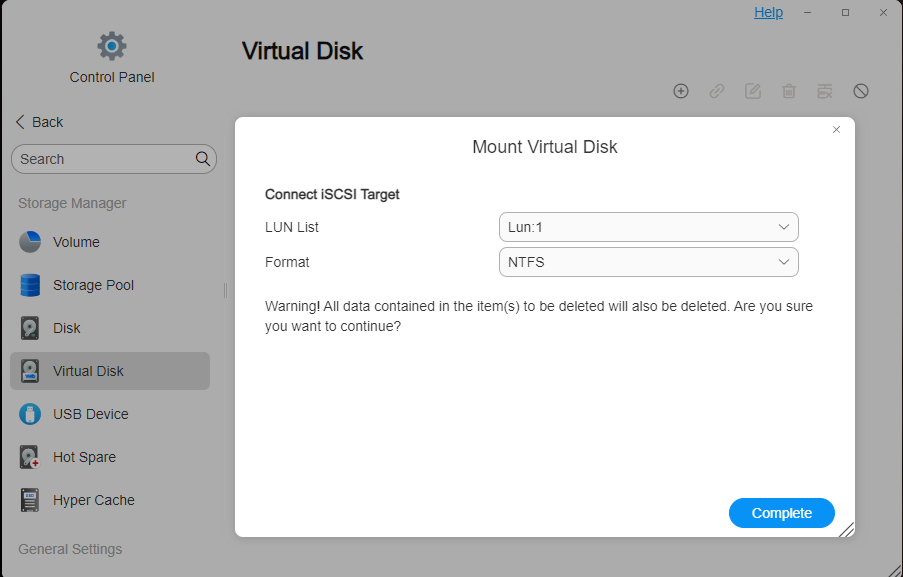
· Select the iSCSI LUN and click “Finish”. Note tha t an iSCSI LUN disk can only be connected to one host or server simultaneously. TNAS supports mounting EXT4 and NTFS disk formats.
3. Access the mounted storage space:
· After mounting successfully, you can see the mounted disk directory in "File Manager" on the target TNAS_B.
· Upload the file or files you want to store to the disk directory.