

I wanted to replace the 250GB M.2 SSDs making Volume1 in my F2-425+ with 500GB drives. So, following the instructions in the FAQ viewtopic.php?t=8036, I replaced M.2-2 and waited for the two drives to synchronise. So far, so good. I then replaced M2-1 and powered the NAS back on. It gave the initial beep then a few seconds later, three quick beeps. The GUI just gives a white screen with "TOS loading" in the middle.
I put the original 250GB drives back in and let them re-synchronise. While that was happening I attached the 500GB drives to my PC to check them then used Diskpart's Clean command to reset them.
I then tried again, starting with M2-1, but got the same result when I replaced M2-2.
These are the boot drives so I'm guessing the synchronise process isn't correctly writing the boot partitions.
Is there anything else I can do to fix this? If I put a monitor on the HDMI port, will it show anything during the boot sequence?
[Help] Drive replacement fails - TOS 7.0.0500
[Help] Drive replacement fails - TOS 7.0.0500
F2-425 Plus, 16GB RAM, 2 x 500GB WD SN700 EXT4 RAID1, 2 x 3TB WD Red EXT4 RAID1, TOS 7.0.<latest>
F4-SSD, 16GB RAM, 4 x 4TB SN700 Btrfs TRAID, TOS 7.0.<latest>
F4-SSD, 16GB RAM, 4 x 4TB SN700 Btrfs TRAID, TOS 7.0.<latest>


Re: [Help] Drive replacement fails - TOS 7.0.0500
Which drive is your current system installed on? If it is installed on an SSD, you need to ensure that at least one SSD has the system installed before migration.
To contact our team, please send email to following addresses, remember to replace (at) with @
Technical team: support(at)terra-master.com(for technical support)
Service team: service(at)terra-master.com(for purchasing, return, replacement, RMA service)
Technical team: support(at)terra-master.com(for technical support)
Service team: service(at)terra-master.com(for purchasing, return, replacement, RMA service)
Re: [Help] Drive replacement fails - TOS 7.0.0500
The system should be on both SSDs as that was what I selected during the initial start-up. Is there any way to check this?
F2-425 Plus, 16GB RAM, 2 x 500GB WD SN700 EXT4 RAID1, 2 x 3TB WD Red EXT4 RAID1, TOS 7.0.<latest>
F4-SSD, 16GB RAM, 4 x 4TB SN700 Btrfs TRAID, TOS 7.0.<latest>
F4-SSD, 16GB RAM, 4 x 4TB SN700 Btrfs TRAID, TOS 7.0.<latest>
Re: [Help] Drive replacement fails - TOS 7.0.0500
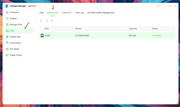
You can confirm which hard drive the current system is installed on in Storage Management - Hard Disk - System Disk. On the System Disk Management page, you can also freely migrate the system between different hard drives.
To contact our team, please send email to following addresses, remember to replace (at) with @
Technical team: support(at)terra-master.com(for technical support)
Service team: service(at)terra-master.com(for purchasing, return, replacement, RMA service)
Technical team: support(at)terra-master.com(for technical support)
Service team: service(at)terra-master.com(for purchasing, return, replacement, RMA service)
Re: [Help] Drive replacement fails - TOS 7.0.0500
As expected, the system is on both M.2 drives.
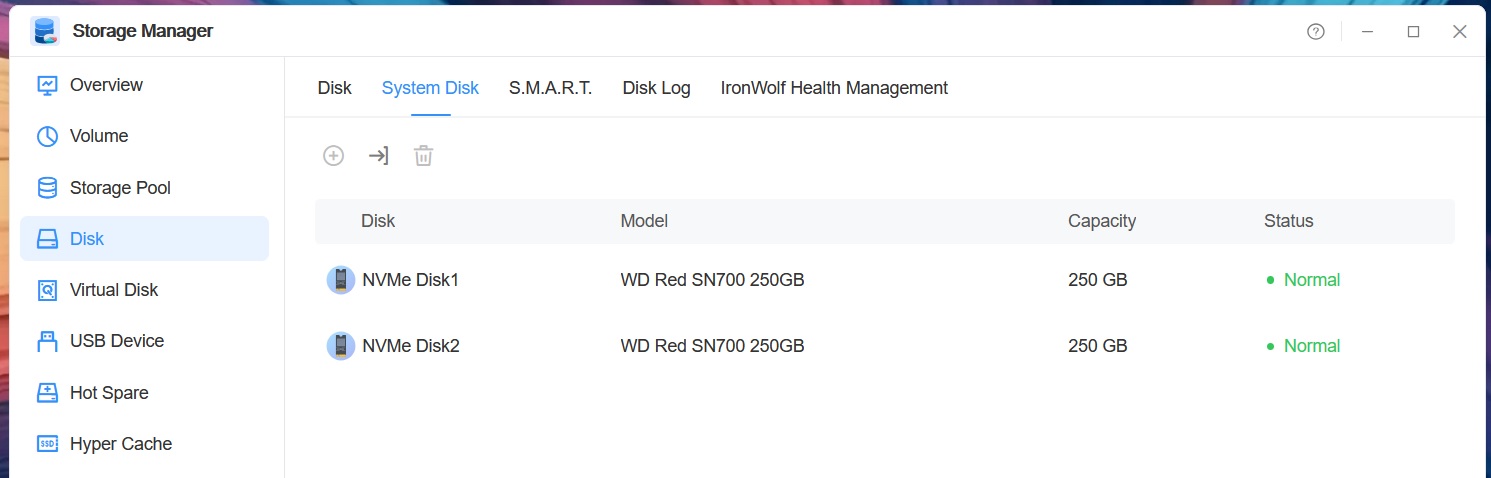
I'll replace one of the 250GB drives with a 500GB then repeat the above check once sync has finished.
If it still shows the system is on both SSDs I'll then just remove the remaining 250GB and restart the NAS to see what happens.
I'll replace one of the 250GB drives with a 500GB then repeat the above check once sync has finished.
If it still shows the system is on both SSDs I'll then just remove the remaining 250GB and restart the NAS to see what happens.
F2-425 Plus, 16GB RAM, 2 x 500GB WD SN700 EXT4 RAID1, 2 x 3TB WD Red EXT4 RAID1, TOS 7.0.<latest>
F4-SSD, 16GB RAM, 4 x 4TB SN700 Btrfs TRAID, TOS 7.0.<latest>
F4-SSD, 16GB RAM, 4 x 4TB SN700 Btrfs TRAID, TOS 7.0.<latest>
Re: [Help] Drive replacement fails - TOS 7.0.0500
So drive replacement worked correctly
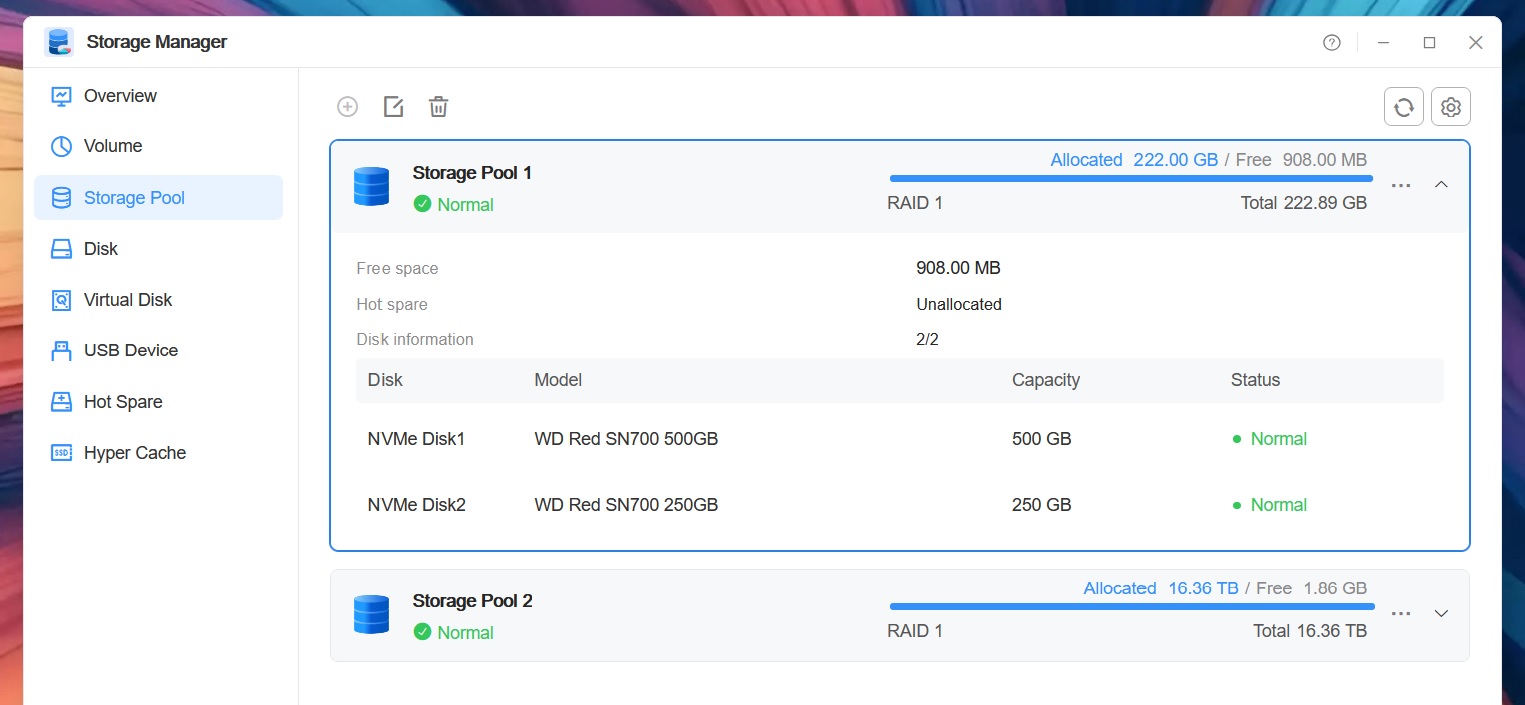
but the new drive is no longer a system drive
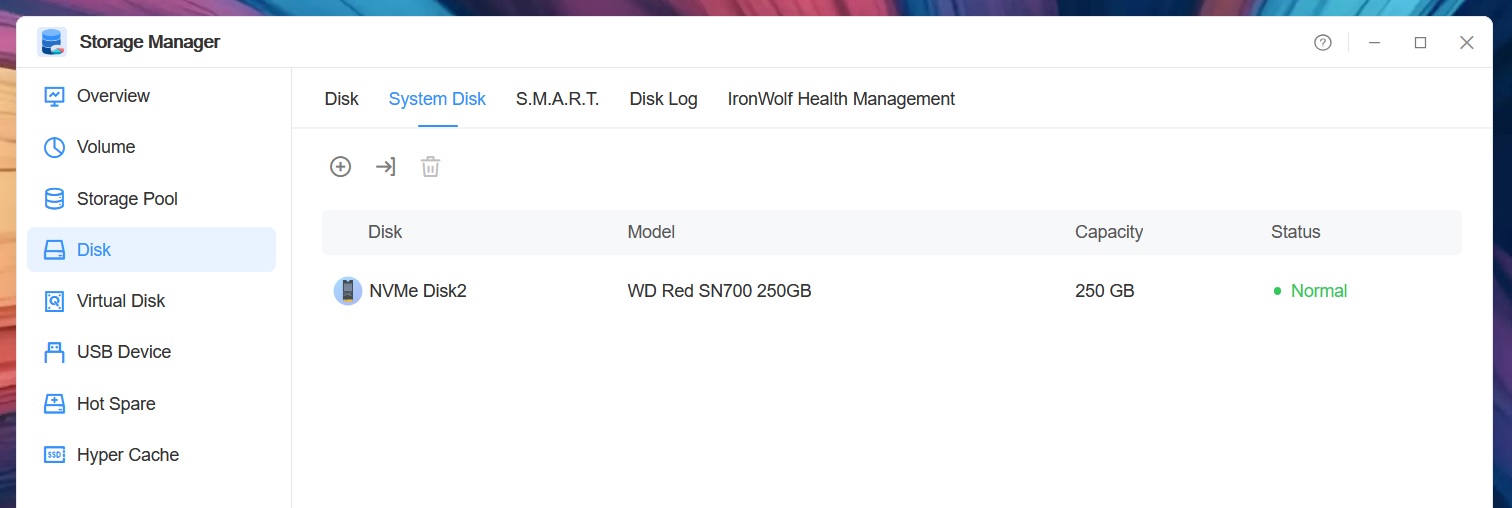
Please could this be fixed soon?
but the new drive is no longer a system drive
Please could this be fixed soon?
F2-425 Plus, 16GB RAM, 2 x 500GB WD SN700 EXT4 RAID1, 2 x 3TB WD Red EXT4 RAID1, TOS 7.0.<latest>
F4-SSD, 16GB RAM, 4 x 4TB SN700 Btrfs TRAID, TOS 7.0.<latest>
F4-SSD, 16GB RAM, 4 x 4TB SN700 Btrfs TRAID, TOS 7.0.<latest>
Re: [Help] Drive replacement fails - TOS 7.0.0500
Please refer to the following steps to add the new hard drive to the system disk:
1.Click the "Create" button, select the disk you want to add as a system disk, and click the "Confirm" button.
2.Confirm your selection again in the pop-up prompt window and click the "Confirm" button.
3.The system will judge the partition of the disk you selected:
• If the disk you selected does not meet the requirements for adding a system partition, you need to format your disk, please click the "Confirm" button again.
• If the disk you selected meets the partition requirements, there is no need to click the "Confirm" button again.
1.Click the "Create" button, select the disk you want to add as a system disk, and click the "Confirm" button.
2.Confirm your selection again in the pop-up prompt window and click the "Confirm" button.
3.The system will judge the partition of the disk you selected:
• If the disk you selected does not meet the requirements for adding a system partition, you need to format your disk, please click the "Confirm" button again.
• If the disk you selected meets the partition requirements, there is no need to click the "Confirm" button again.
To contact our team, please send email to following addresses, remember to replace (at) with @
Technical team: support(at)terra-master.com(for technical support)
Service team: service(at)terra-master.com(for purchasing, return, replacement, RMA service)
Technical team: support(at)terra-master.com(for technical support)
Service team: service(at)terra-master.com(for purchasing, return, replacement, RMA service)