

Applicable Models: F8 SSD PLUS, F4-424 Pro, F4-424MAX
This tutorial uses RR boot (rr.img), Synology DS925+, to install DSM 7.2 system.
1. Preparation
You will need the following tools and files:
- RR boot image (rr.img): Used to create the bootable USB drive.
- USB Drive: It is recommended to use a USB 3.0 drive with at least 8GB capacity.
- Flashing Tool: balenaEtcher is recommended.
- Monitor, keyboard, mouse, HDMI cable: Needed for the initial setup.
- Ethernet cable with internet access
RR Boot Image Download Link: https://github.com/RROrg/rr/releases
2. Create Bootable USB Drive
1. Insert the USB drive.
2. Open the balenaEtcher software.
3. Click “Flash from file” and select your rr.img image.
4. Click “Select target” and choose your USB drive.
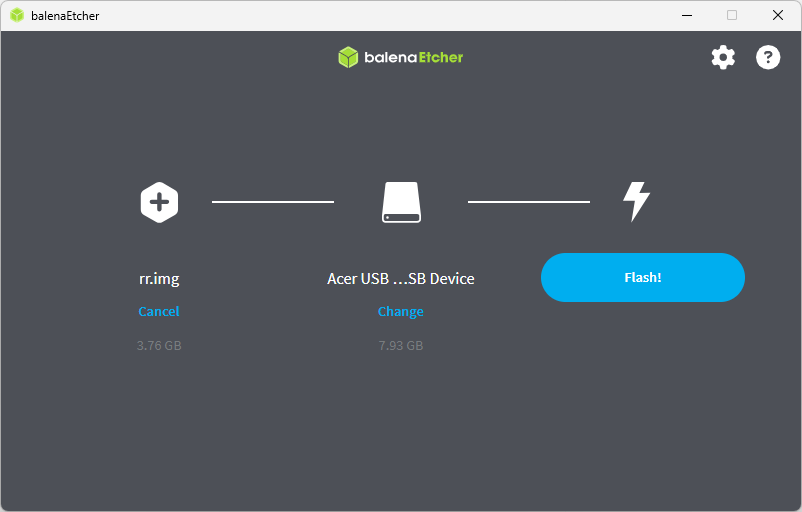
5. Click “Flash” to start writing.
6. After flashing is complete, safely eject the USB drive.
3. BIOS Settings
F8 SSD PLUS / F4-424 Pro Settings:
- Press DEL during boot to enter BIOS.
- Go to: Boot -> TOS Boot First -> Disable
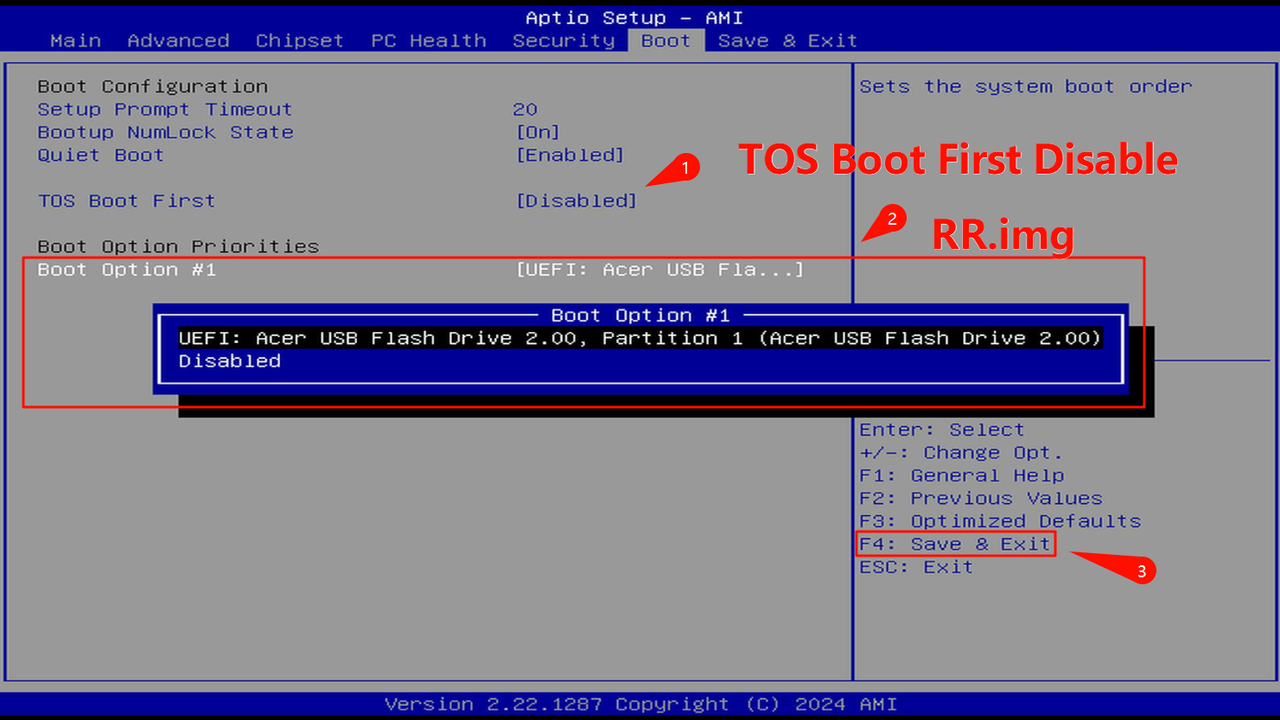
- Set Boot Option #1 to RR.img boot USB drive.
- Press F4 to save and exit BIOS.
- Enter BIOS -> Fast -> TOS Boot First -> Disable
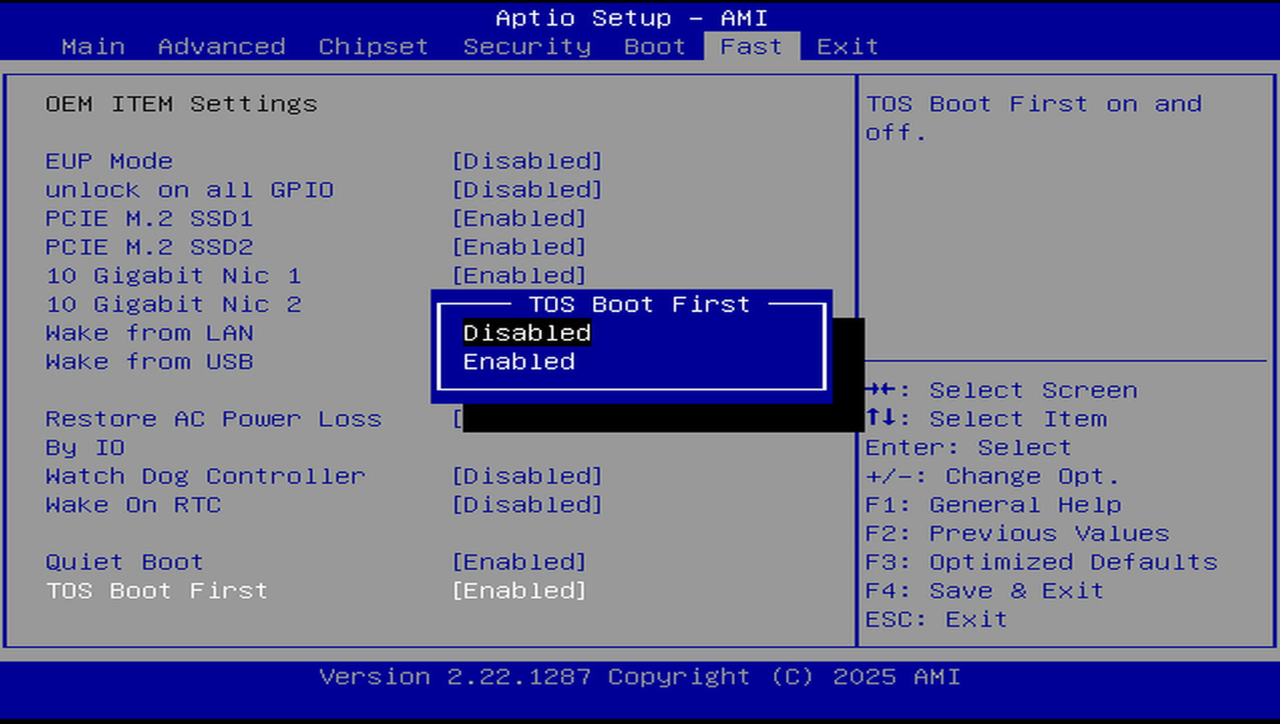
- Boot -> UEFI USB Drive BBS Priorities -> Boot Option #1 -> RR.img boot USB drive
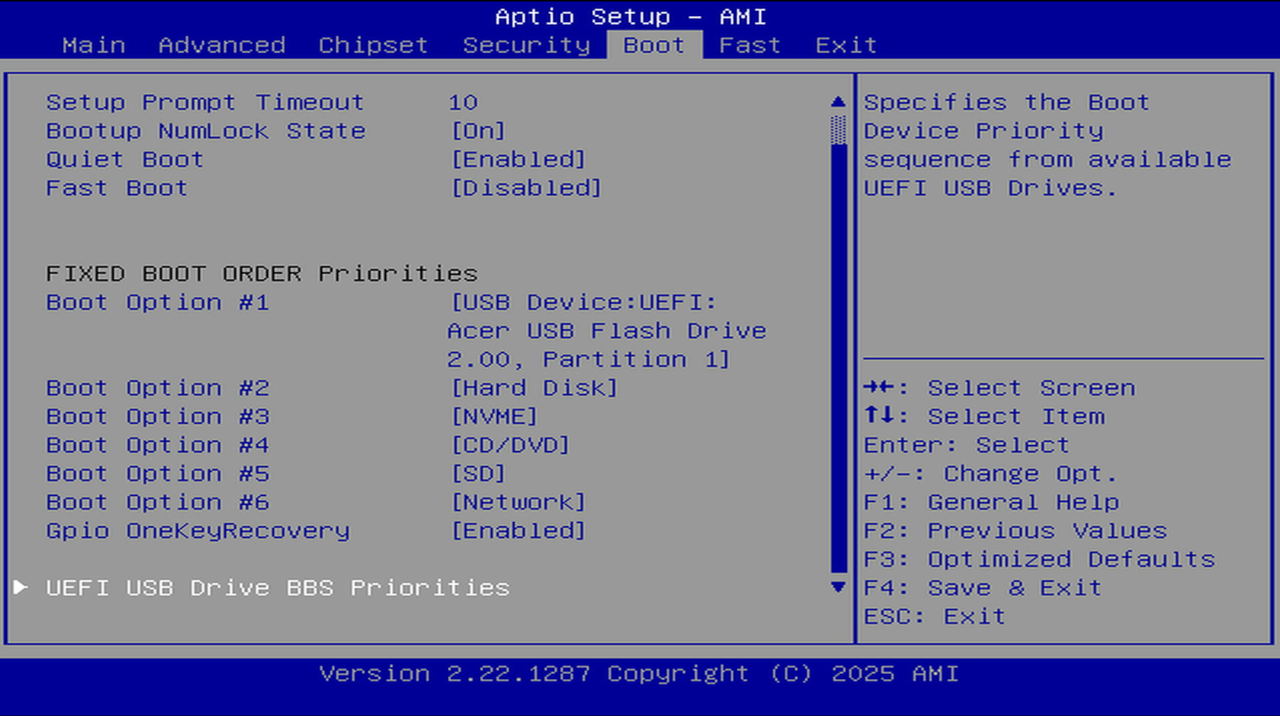
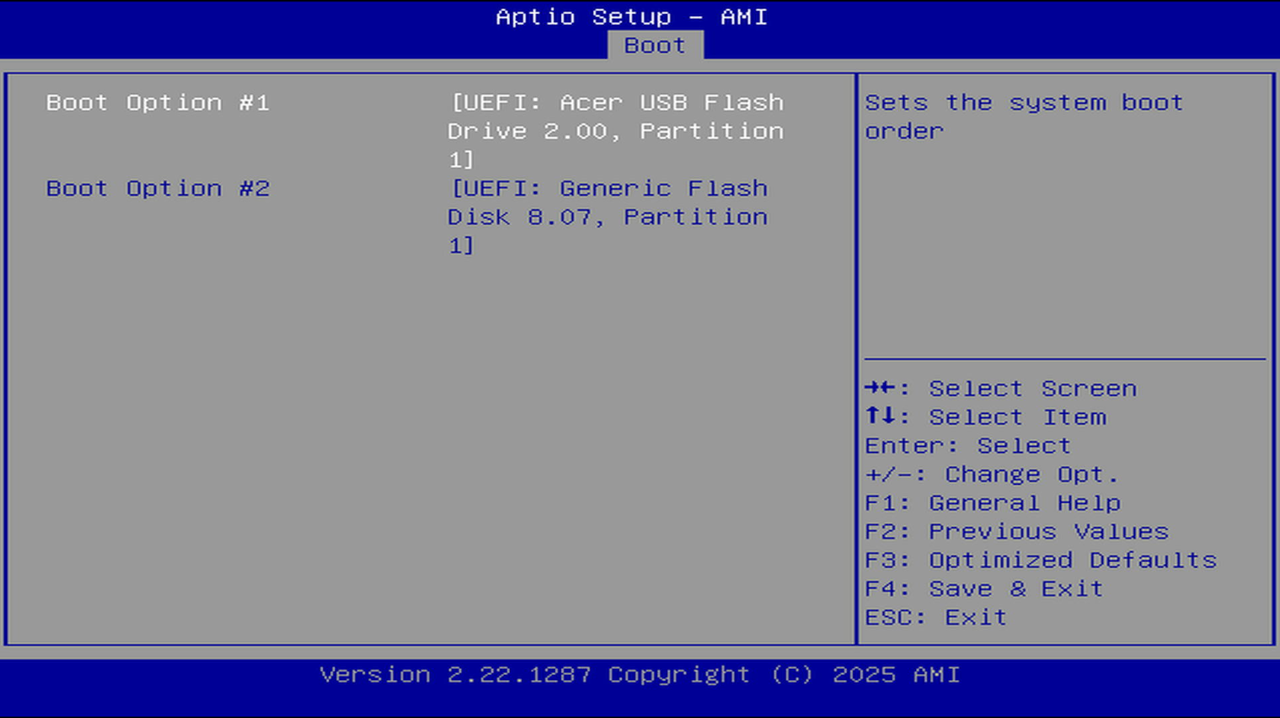
- FIXED BOOT ORDER Priorities -> Boot Option #1 -> RR.img boot USB drive
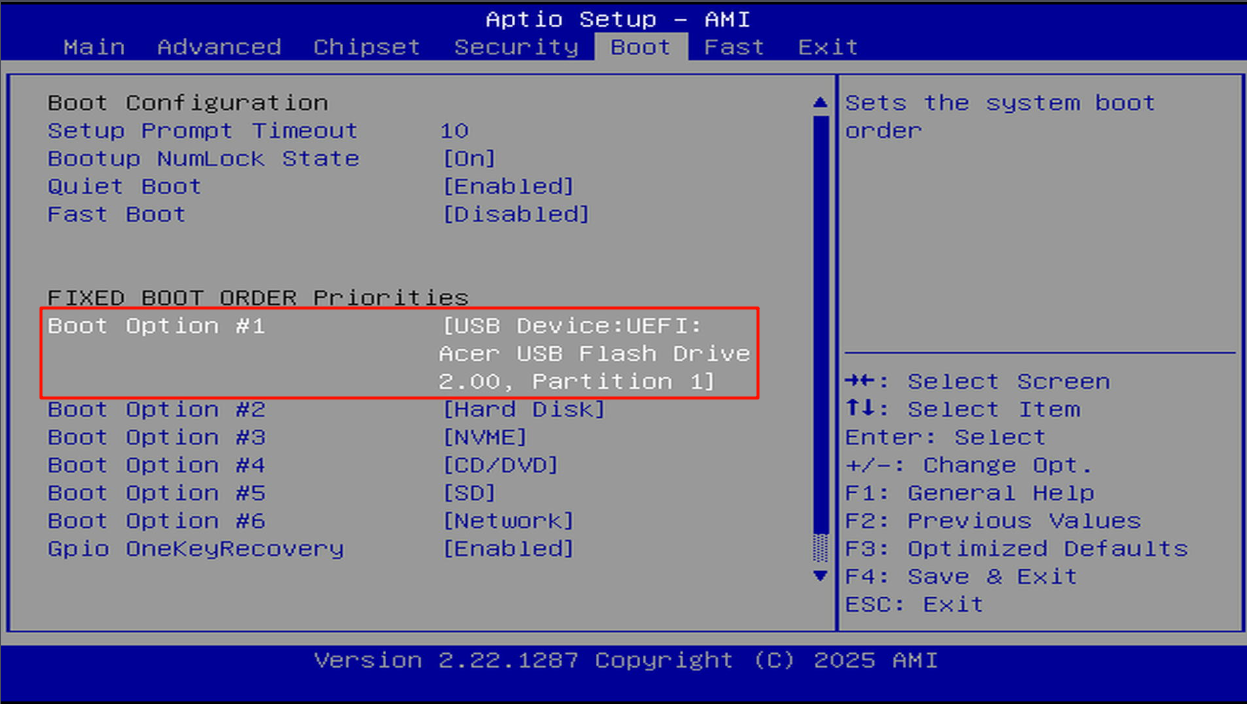
- Press F4 to save and exit BIOS.
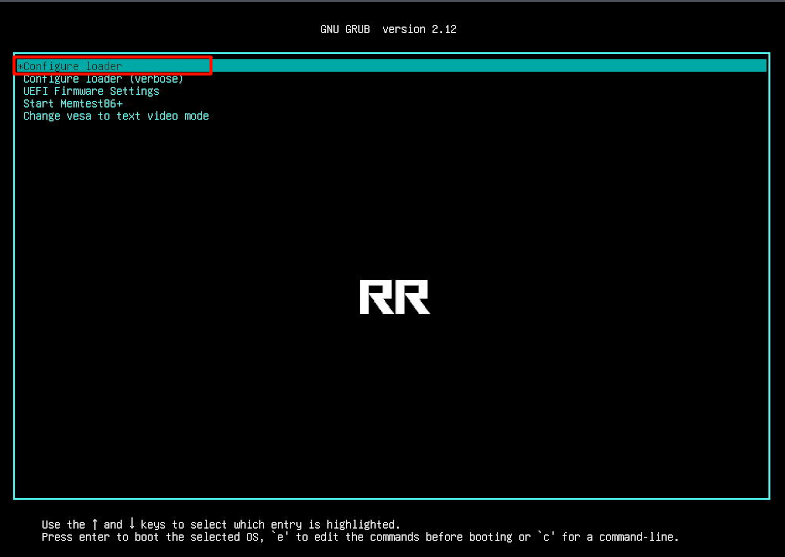
1. After booting with the USB drive, you will see the GRUB menu, select: Configure loader
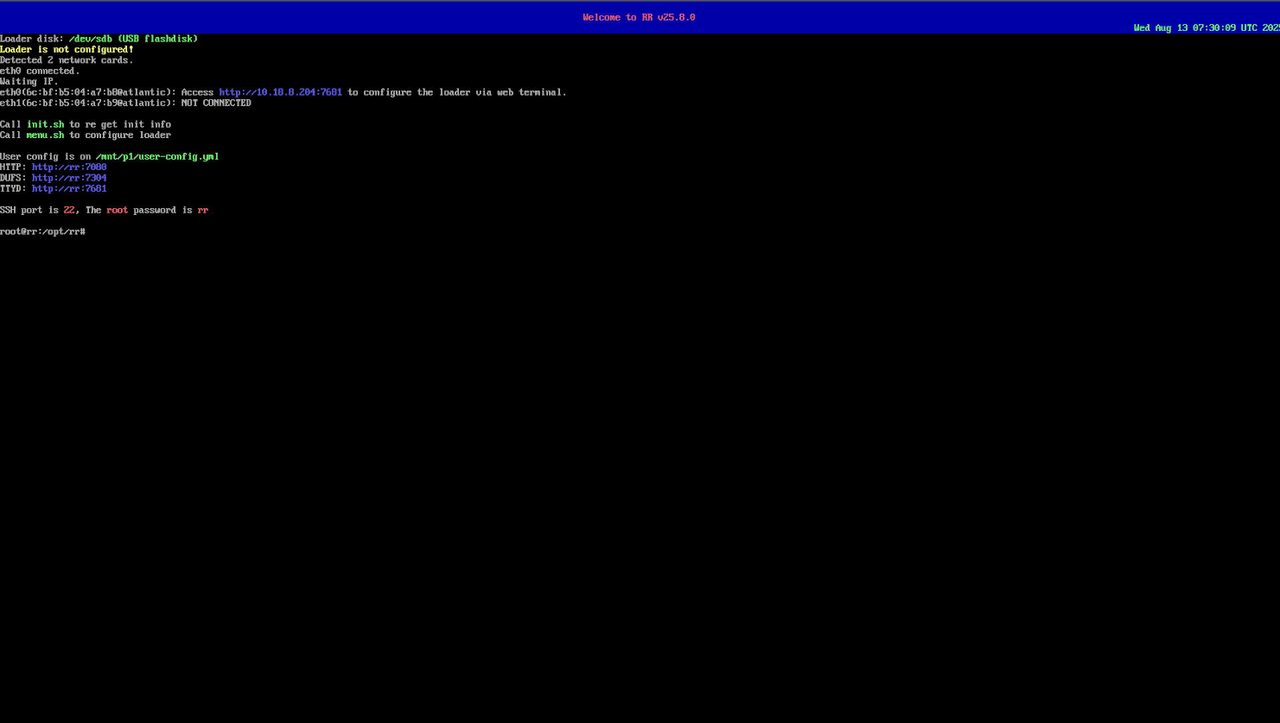
2. Access the RR configuration page in your browser.
Configuration Steps:
- Click “Choose a model”, select DS925+
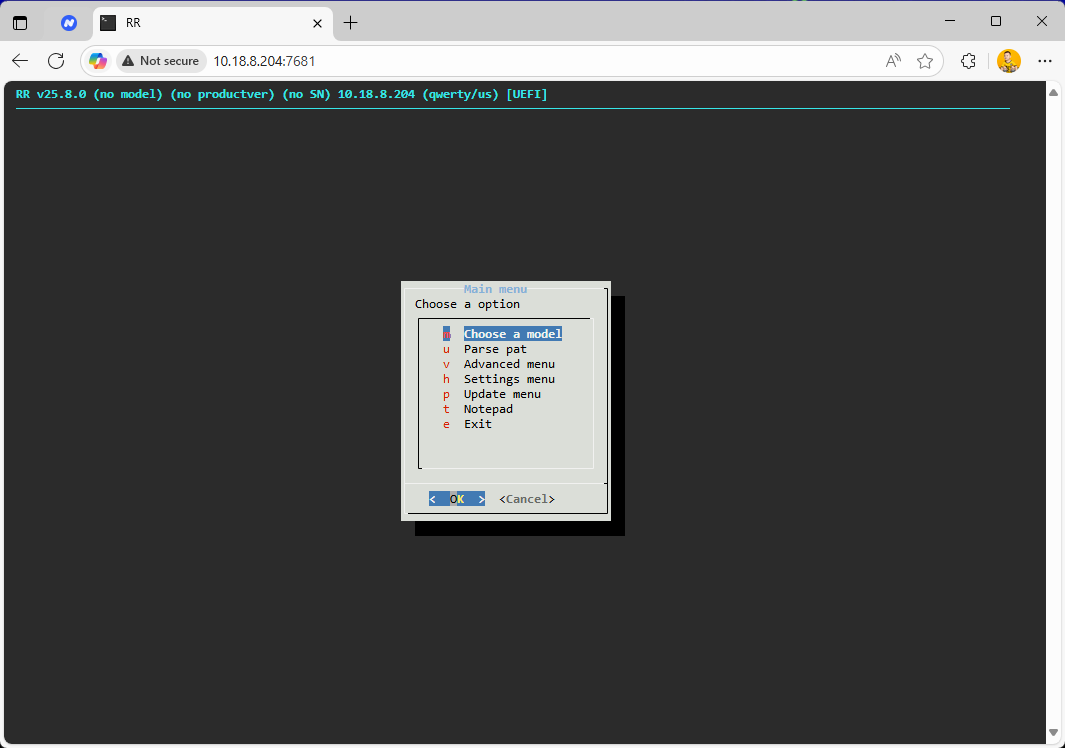
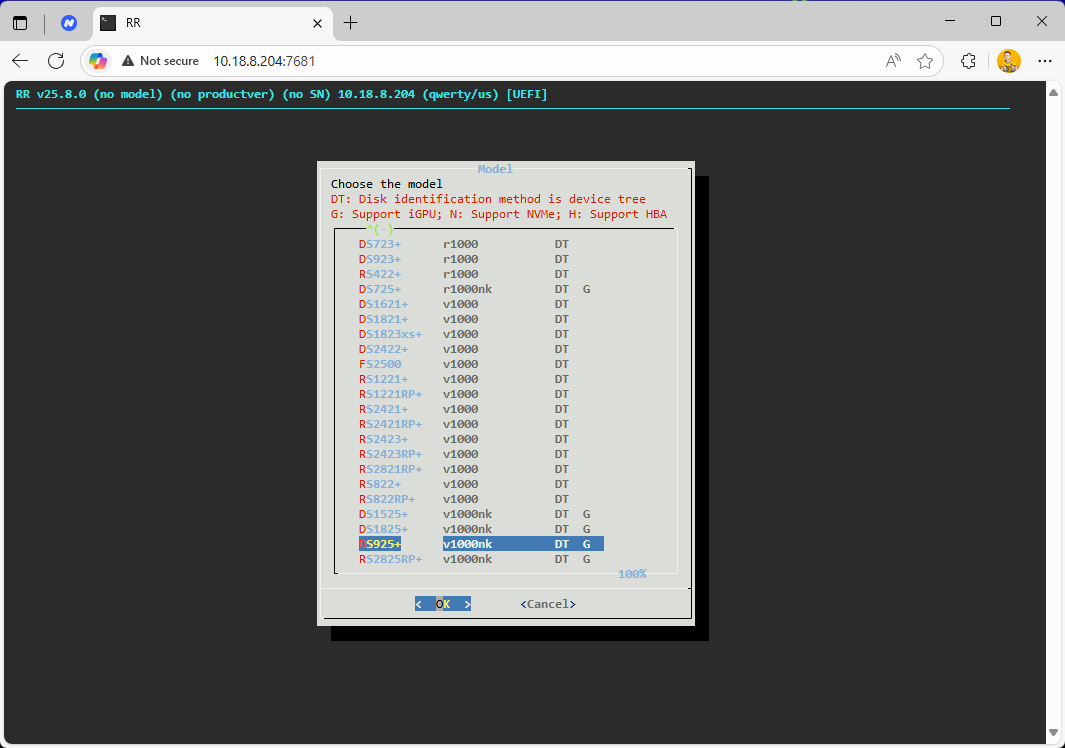
- Click “Choose a version”, select 7.2.2-72806-0
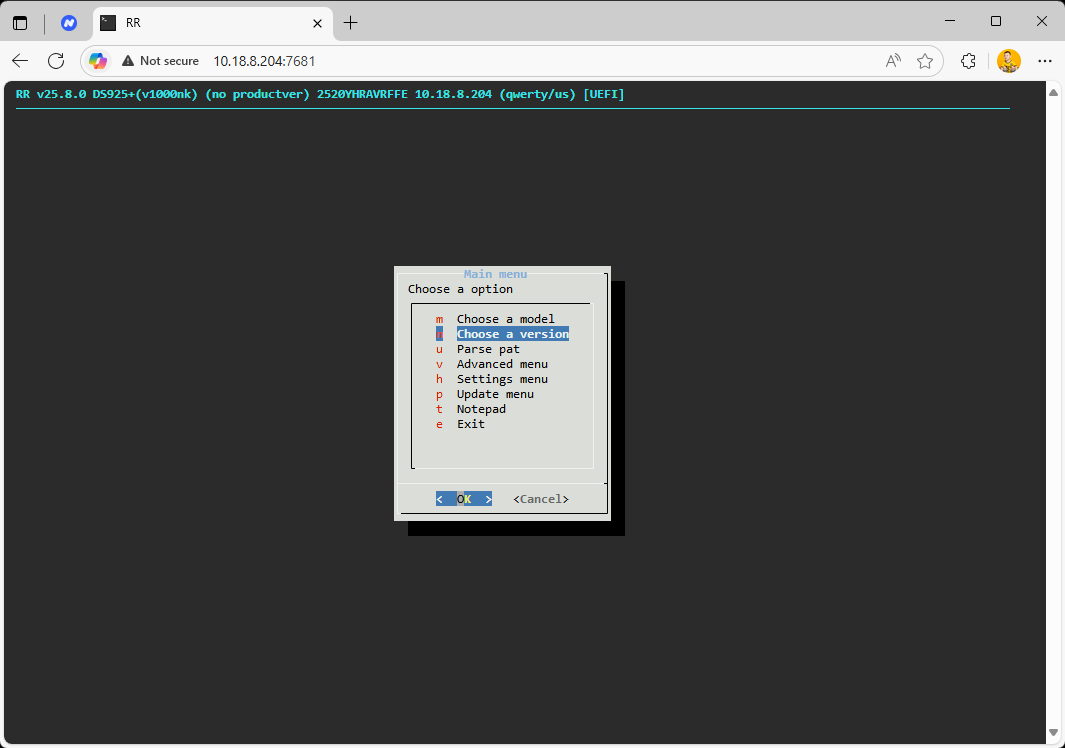
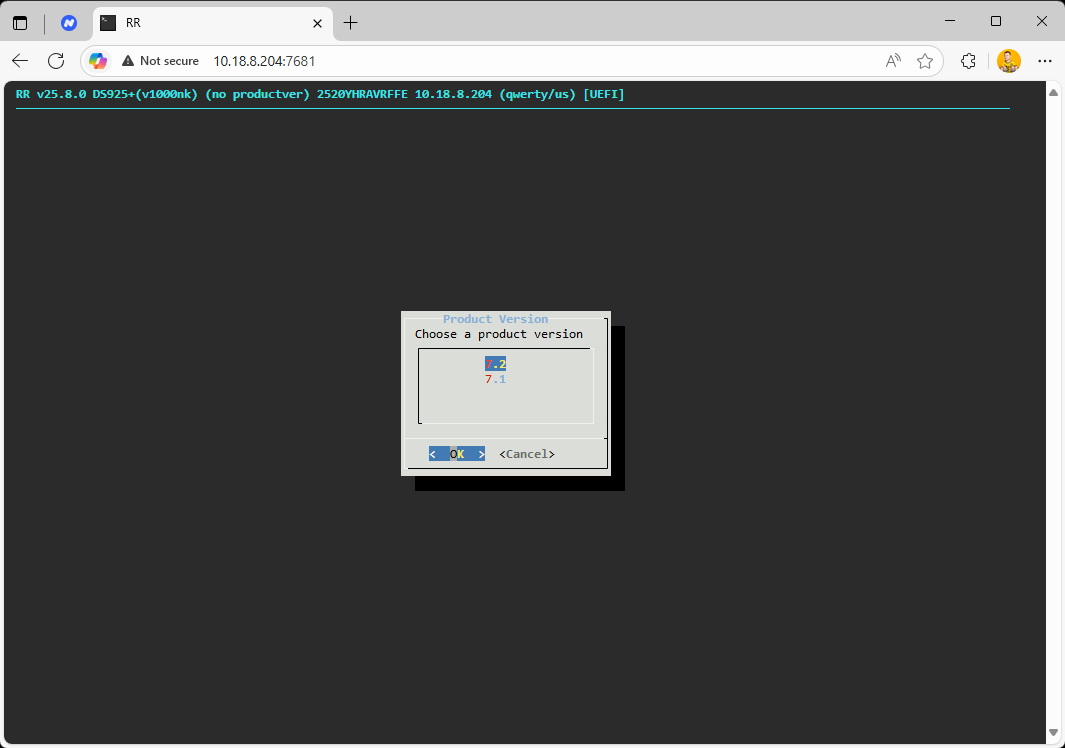
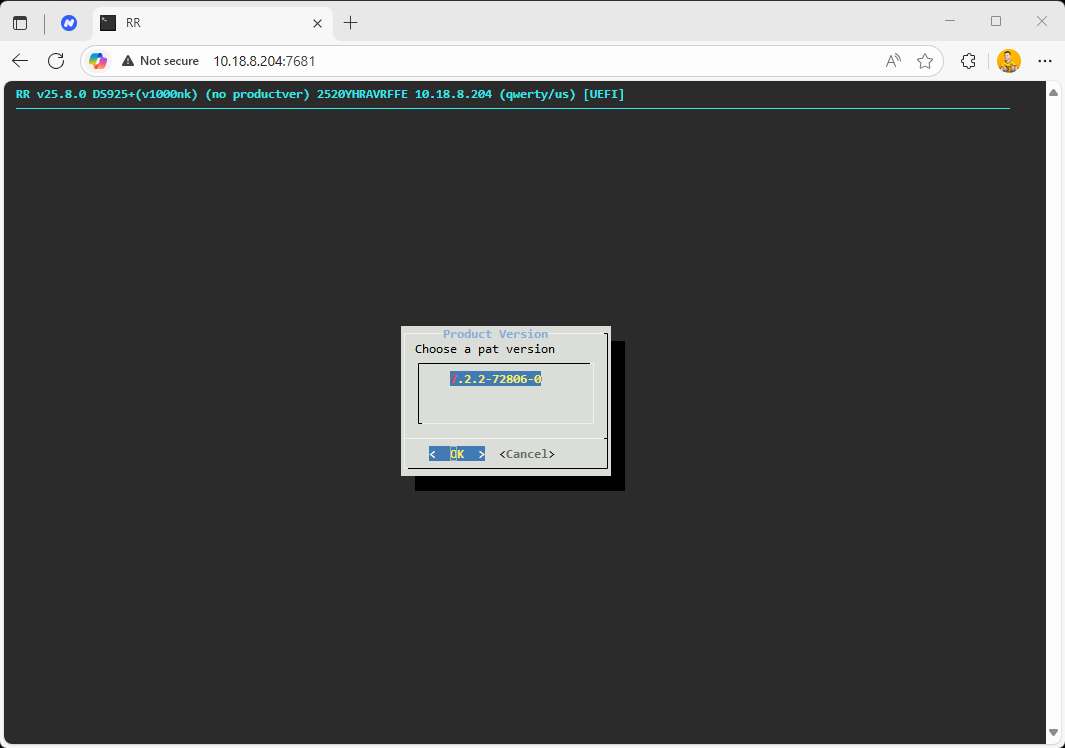
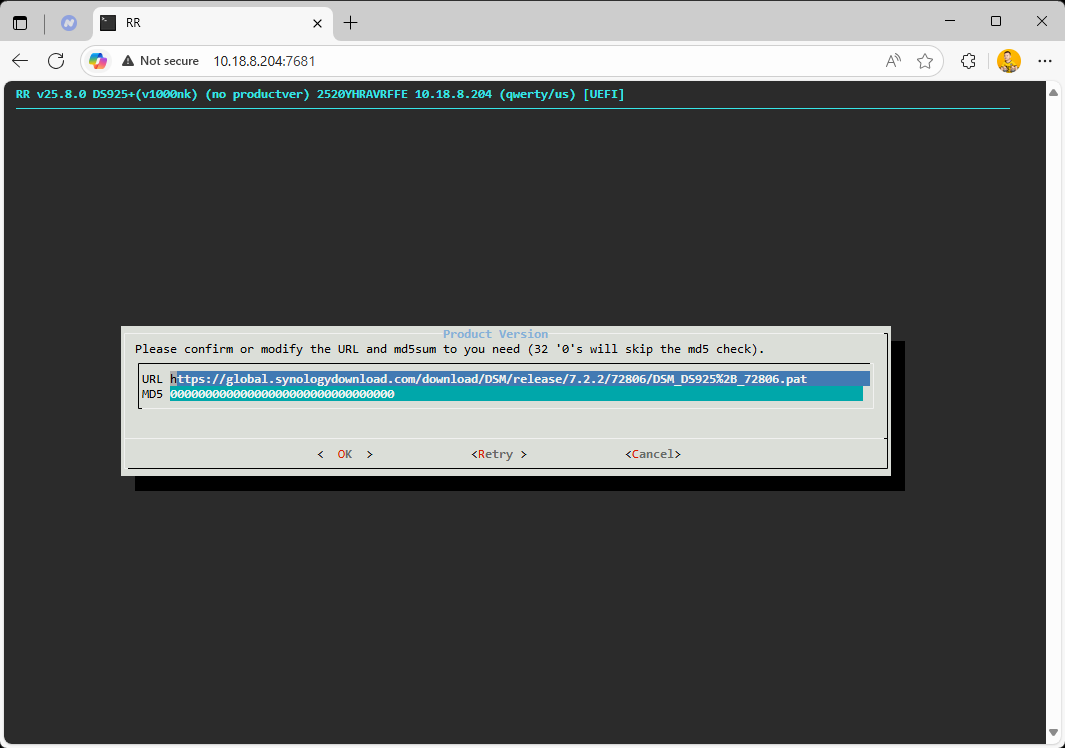
- Go to Advanced menu
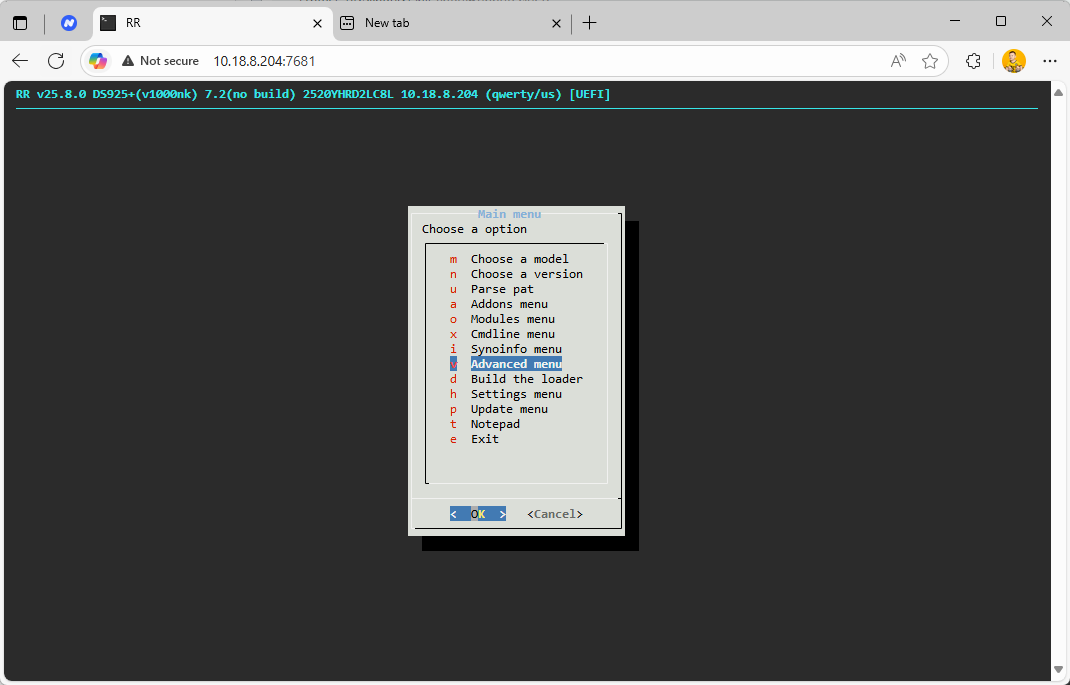
- Set HDD sort (hostplug) to true
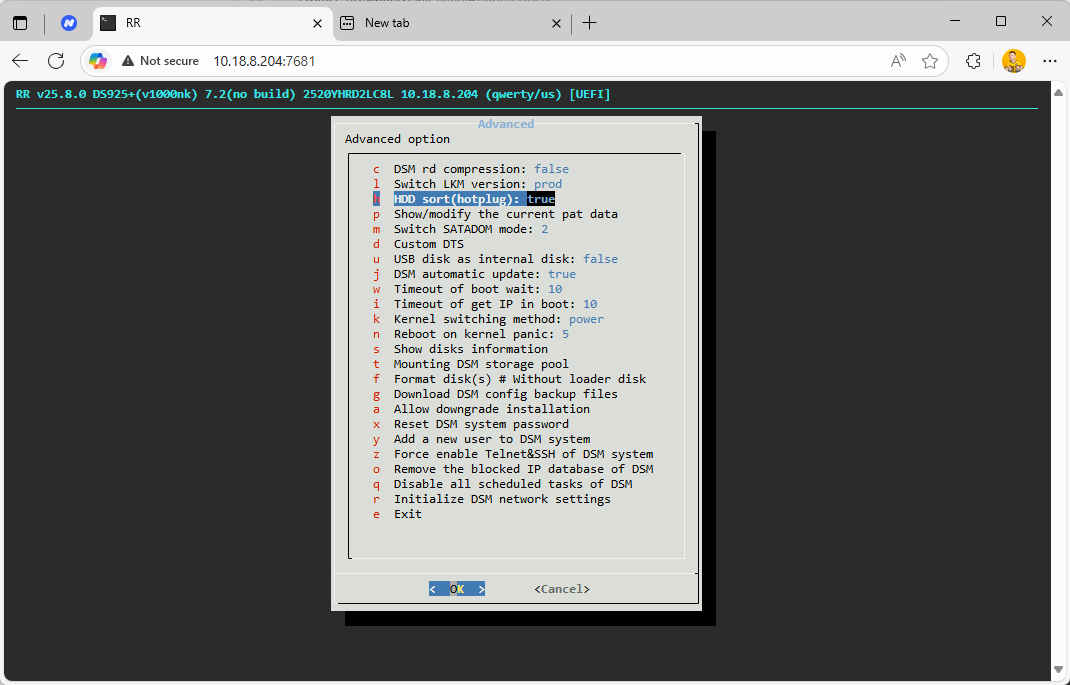
- Click “Build the loader”
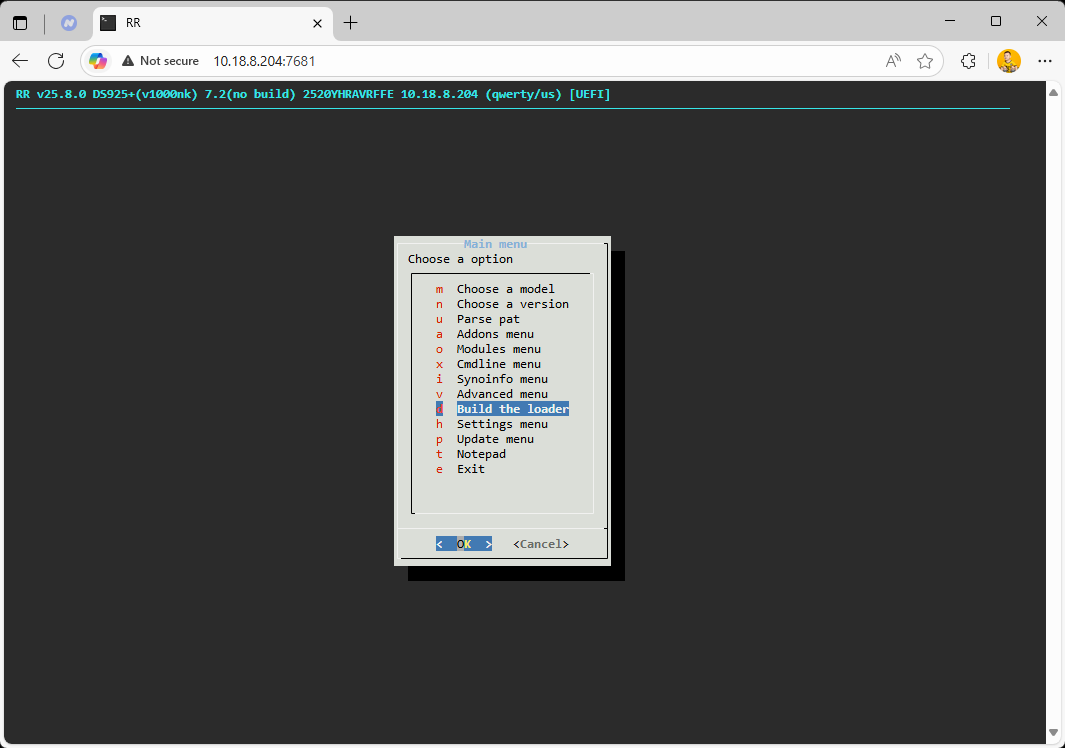
- Once completed, click “Boot the loader”
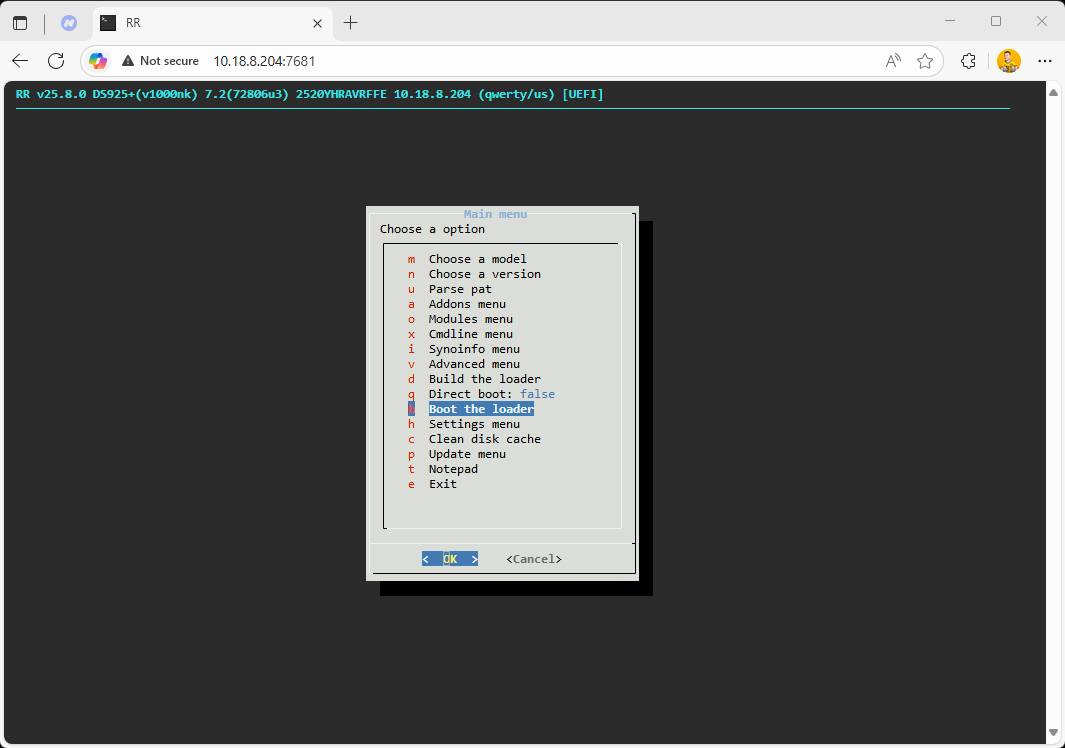
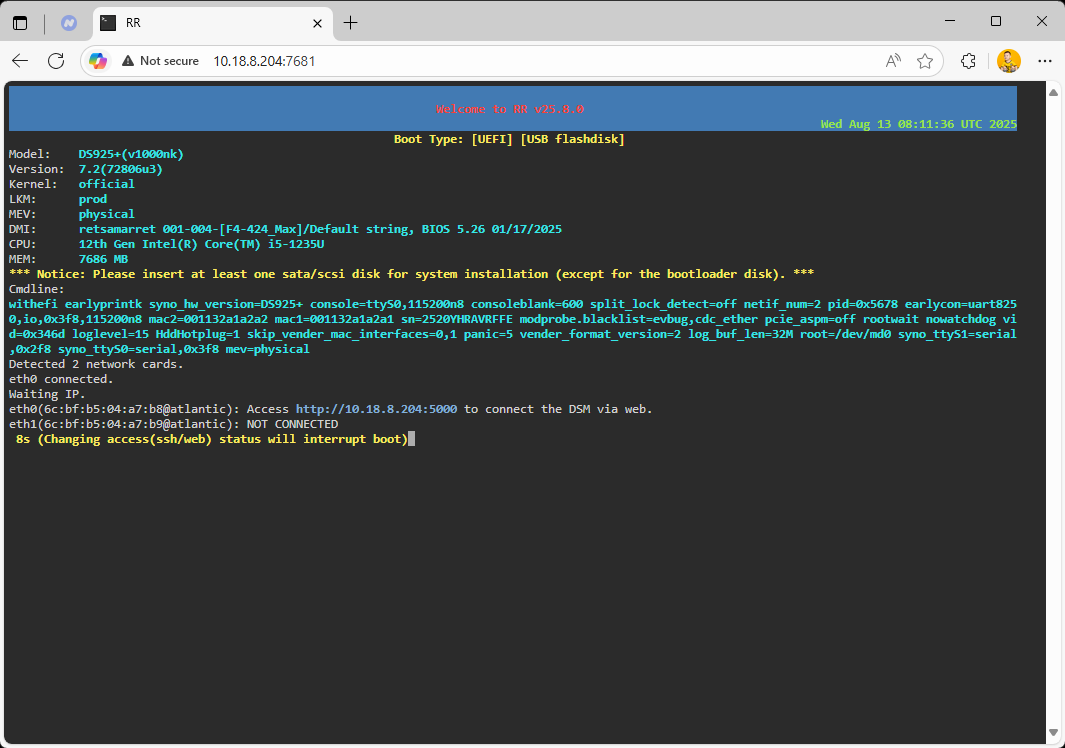
1. Open the DSM installation page
Access via browser: http://10.18.8.204:5000 (IP address may vary)
2. Automatically download and install DSM
- Click “Install”
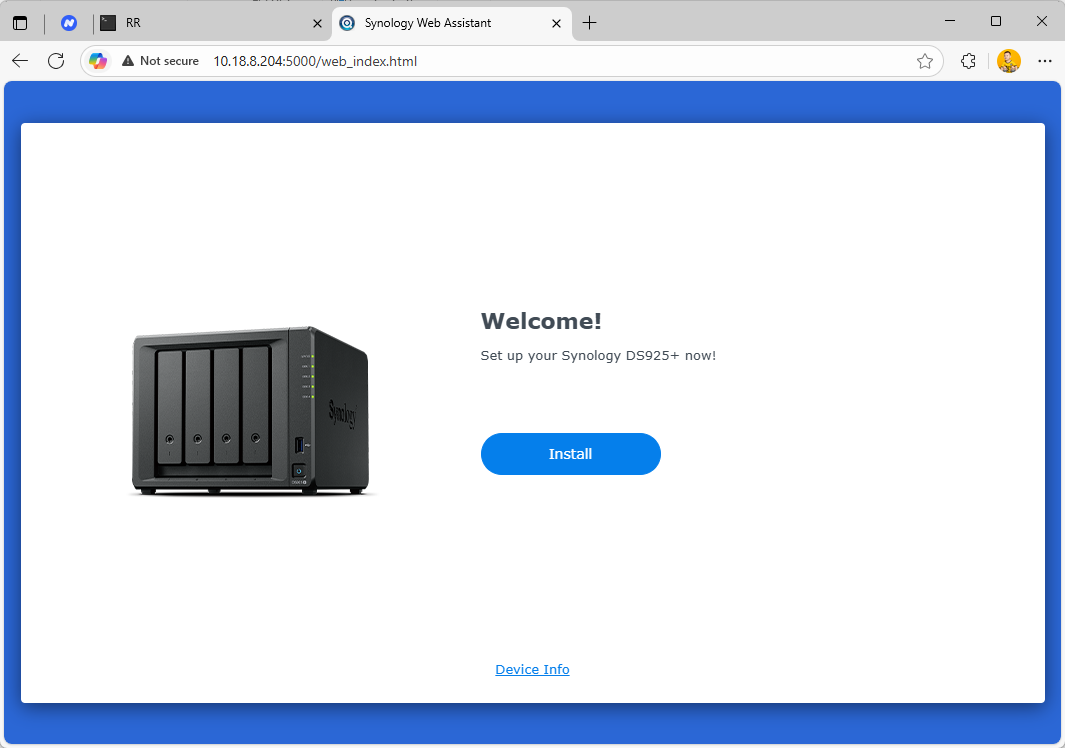
- Choose to automatically download and install DSM system
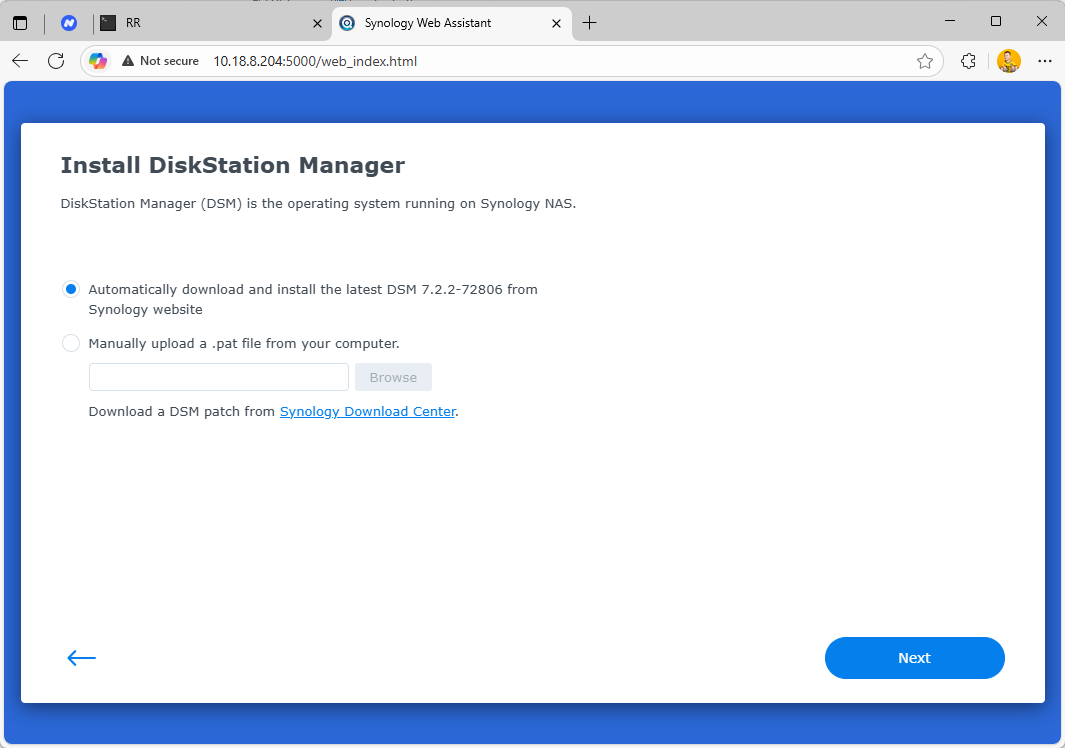
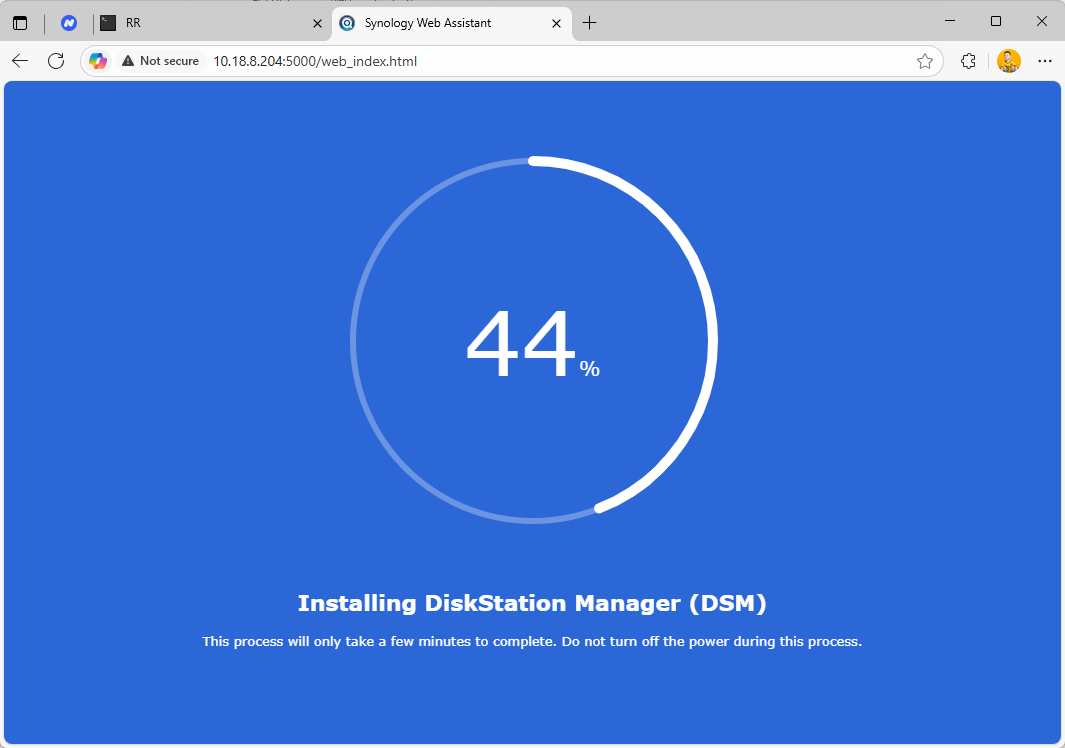
- System will reboot after installation
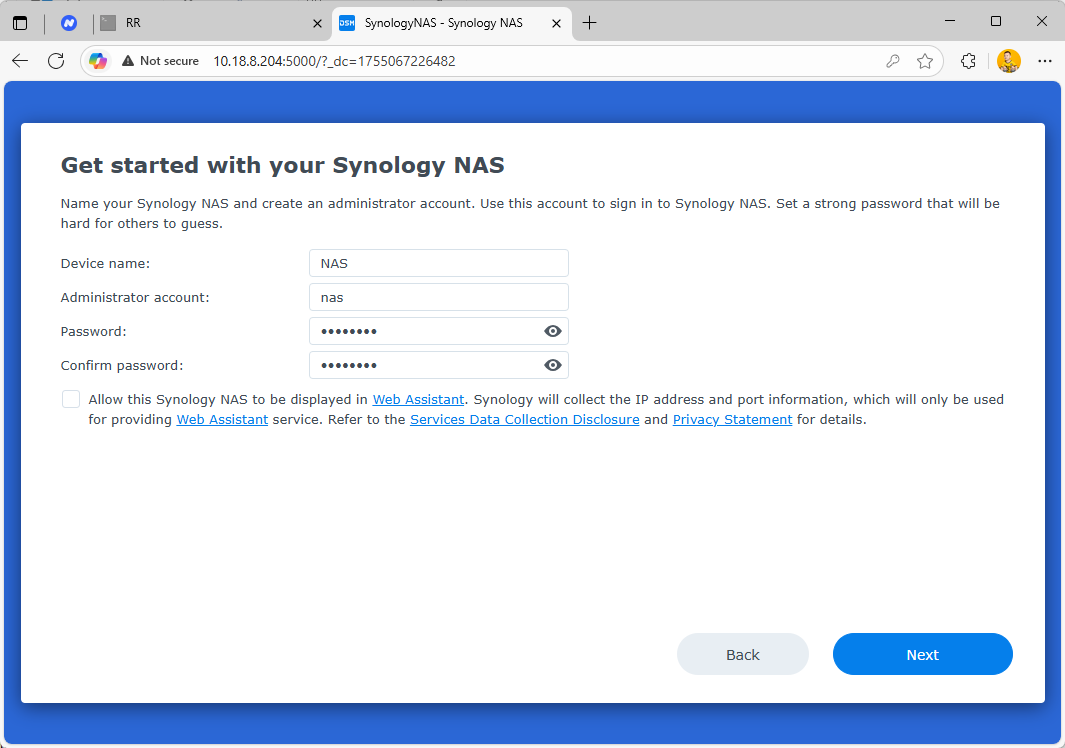
- Set device name
- Create admin account and password
6. System Configuration Suggestions
- It is recommended to choose “Manual Update” to avoid system issues caused by automatic updates.
- You can skip Synology account binding.
 Installation Complete!
You have successfully installed DSM 7.2. You can now enjoy the powerful features of Synology NAS!
If you have any questions, feel free to leave a comment in this thread.


