
F2-223, F2-423, F4-223, F4-423, T6-423, T9-423, T12-423, U4-423, U8-423, U12-423
(If you are using other series of 223/423 models, please provide the invoice information to the technical support mailbox to obtain the corresponding BIOS separately.)
Fault phenomenon:For a few users with special needs, they would like to customise the TNAS disks boot order, but find that they cannot set the boot disks order under Bios and can only boot from the TOS system disks by default.
Countermeasures:You need to update Bios. Specific steps for updating Bios:
Bios file zip package for F2-223, F2-423, F4-223, F4-423:
https://download2.terra-master.com/Bios_T1509BG0.zip
Bios file zip package for T6-423:
https://download2.terra-master.com/T1509BF2.zip
Bios file zip package for T9-423,T12-423,U4-423,U8-423,U12-423:
https://download2.terra-master.com/T7309A13.zip
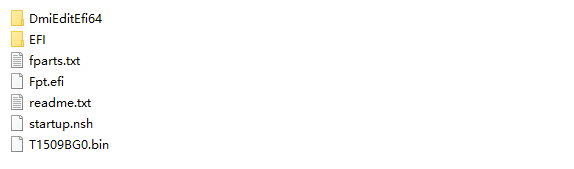
1. Prepare an empty USB stick and format it in FAT format, extract Bios_T1509BG0.zip and copy all the files from it to the root directory of the USB stick.
2. Unplug all hard drives from the TNAS, dismantle the TNAS and remove the boot USB drive inside the TNAS.
(Note:You can also upgrade the Bios without dismantling the TNAS.However, there will be two USB stick boot entries on the Bios settings page at“Boot> UEFI USB Drive BBS Priorities > BOOT Option #?”so you will need to find the corresponding Bios USB stick.)
3. Insert the USB stick containing the Bios files into the TNAS.
4. Connect the TNAS to the monitor via the HDMI cable and connect the keyboard with the USB plug to the TNAS.
5. Turn the TNAS on. After the display shows the Bios main page, please press the Esc or Delete key to go to the Bios settings page.
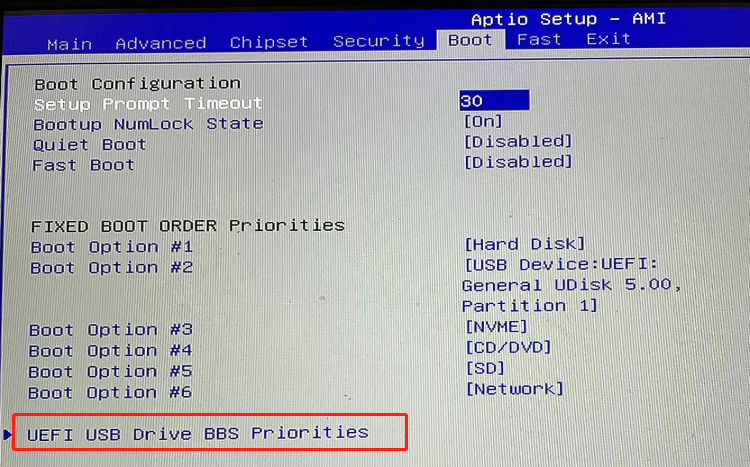
6.Select Boot > UEFI USB Drive BBS Priorities, press the Enter key,change item BOOT Option #1 from Disable to UEFI: General UDISK 5.00, Partition 1,Press Enter again and press F4 to save, then Bios will go to the automatic update page.
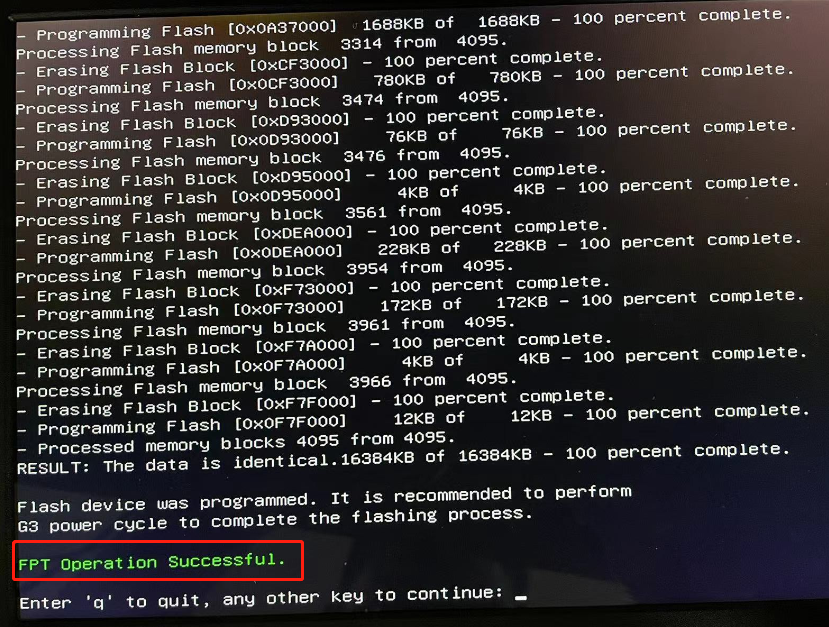
7. Once the Bios update is complete, it will display the following page.
8. Close TNAS and remove the USB stick containing the Bios files. Connect the USB stick to the computer and delete all the files on the USB stick except for the DmiEditEfi64 and EFI.

9. Then insert the USB stick containing the Bios files into the TNAS and boot it up. After the display shows the Bios main page, please press the Esc or Delete key to go to the Bios settings page.
10. Select Boot > UEFI USB Drive BBS Priorities, press the Enter key,change item BOOT Option #1 from Disable to UEFI: General UDISK 5.00, Partition 1,Press Enter again and press F4 to save. Bios will then enter the shell interface.
11. Please enter the following command in the shell interface.
If the model is F4-423, enter the following command:
Code: Select all
fs0:
cd DmiEditEfi64
AMIDEEFIx64.EFI /SP 000-F4423-NT140-0001Code: Select all
fs0:
cd DmiEditEfi64
AMIDEEFIx64.EFI /SP 000-T6423-NT140-0001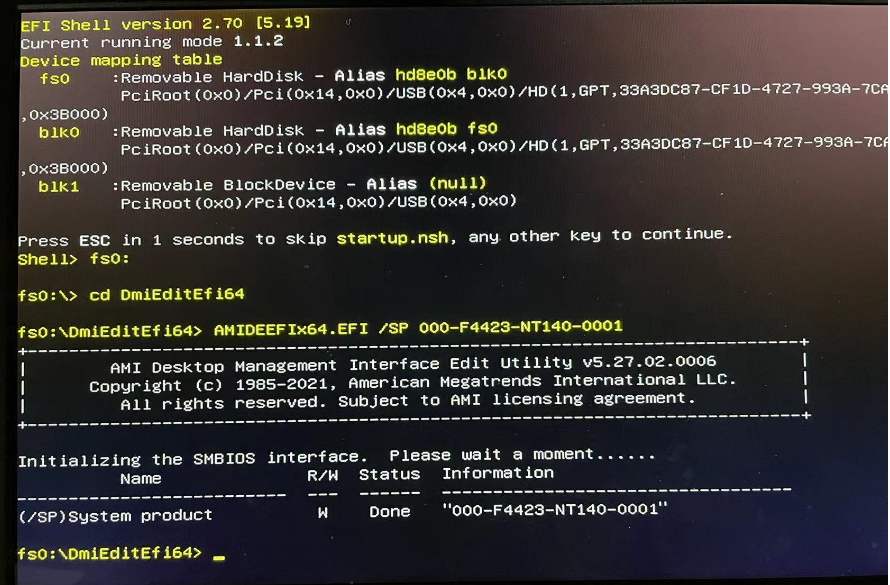
"F4423" or "T6423" represents your TNAS model, if you are using other applicable models, you only need to change it to the combination of letters and numbers corresponding to the TNAS model.
12. Turn the TNAS off and remove the USB stick containing the Bios file. Install the boot USB stick that was originally located inside the TNAS back into the TNAS, install the hard disks back into the corresponding hard disk slots, and you can boot up the TNAS and continue using it.
13. If you want to adjust the order of the boot disks under Bios, repeat step 5,then select Fast > TOS Boot First,change this item to Disabled ,then set the boot sequence again to save the boot sequence.


