Page 4 of 9

Re: Instructions for Adding HDDs to RAID

Posted: 02 Oct 2024, 21:46
by wenuam
TMLeeh wrote: 02 Oct 2024, 21:06 Synchronization acts on the storage pool, and when you delete the storage, the storage pool no longer exists and synchronization will not continue.
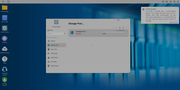
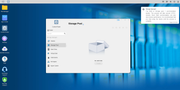
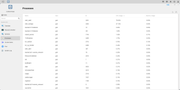
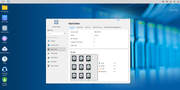
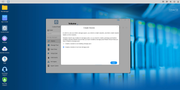
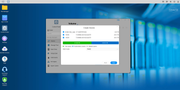
I can tell you that the synchronization process is indeed continuing, despite me having deleted the storage pool and the volume.

7 HDs out of 9 are working hard currently, even though not having any volume or storage pool left in the interface.

If I reboot the NAS, it resumes the synchronization, yet still neither volume nor storage pool present/visible anymore.
Image
Image
Image
Image
TMLeeh wrote: 02 Oct 2024, 21:06 Regarding the issue of being unable to create a new volume that only contains the last 2 HDs, could you provide a more detailed description and screenshot so that we can solve the problem for you?
Not that I want to create a new volume with only 2 HDs, since I deleted the storage pool and the volume.

I want to recreate a new volume with all the 9 HDs, yet only the 2 remaining HDs that are not into the synchronization process are available.
Image
Image
Image

Re: Instructions for Adding HDDs to RAID

Posted: 02 Oct 2024, 22:30
by wenuam
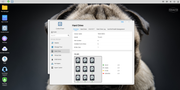
Not having to waste 29 hours of synchronization for nothing, I made a factory reset :
Image
Image
Image
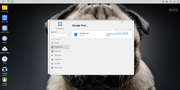
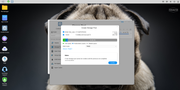
Yet despite the 9 HDs being present, the NAS resumes the synchronization on the 7 HDs and allows me only the 2 last HDs to be used :
Image
What can I do ?

Re: Instructions for Adding HDDs to RAID

Posted: 03 Oct 2024, 18:51
by wenuam
Ok, I removed one by one all 9 HDs and (quick) formatted them on another computer.

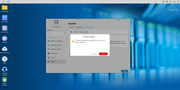
Upon restarting the NAS with the 9 HDs, it proposed me to erase them :

Image

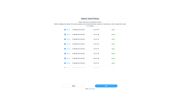
However, it restarted synchronizing the first 7 HDs and allowing me only the last 2 HDs :

Image

How I'm supposed to use all my 9 HDs in one storage pool/volume ?

Re: Instructions for Adding HDDs to RAID

Posted: 03 Oct 2024, 19:59
by TMtina
You can delete the existing storage pool and then create a new one using all nine hard drives.

Re: Instructions for Adding HDDs to RAID

Posted: 03 Oct 2024, 20:07
by wenuam
Yet the existing storage pool has already been deleted, why the NAS keeps trying to recreate/synchronize it ?

How do I cancel the current synchronization process running ?

Re: Instructions for Adding HDDs to RAID

Posted: 05 Oct 2024, 00:13
by wenuam
My 7 HDs are working for more than 30h now, without them appearing as storage pool or volume in the interface.

I just added HD8 as solo TRAID just to finish the installation process :
Image
Image
Image
I just can add HD9, it appears in the HMI, but none of the 7 HDs :
Image
What can I do ? I just cannot
TMtina wrote: 03 Oct 2024, 19:59 delete the existing storage pool and then create a new one using all nine hard drives.
I already tried factory reset, but it didn't changed anything, the first 7 HDs are obviously definitively lost.

Should I return the NAS to Amazon and get my money back ?

Regards.

Re: Instructions for Adding HDDs to RAID

Posted: 05 Oct 2024, 01:23
by wenuam
I've reset the configuration and now after reboot, I cannot no longer initialize an account, any password is refused :
Image
What is going on with this NAS ?

Help.

Re: Instructions for Adding HDDs to RAID

Posted: 05 Oct 2024, 07:09
by wenuam
Ok, I'm getting nowhere as the 7 HDs are always working at 100% 24/7 without generating a storage pool.

I tried to reset CMOS, thinking that the settings was stored somewhere :

viewtopic.php?p=30798#p30798

From there, no network connection to the NAS possible anymore, while it worked well before.

I attached a HDMI screen and a USB keyboard to explore the BIOS settings, nothing quite fancy to be found.

As the BIOS looked old (2022) I followed the steps here to update it to 2023 :

viewtopic.php?t=4238

After BIOS flash, reboot, no beep, I thought I bricked the NAS :

viewtopic.php?p=33509

Just had to wait 2 minutes for the AMI logo to appear again (it's surprisingly long the first time after a BIOS update).

I then set the product ID to "000-T9423-NT140-0001" (it's a T9-423).

Reboot, enter BIOS settings, restore defaults, save and exit.

After reboot on the USB init disk, I was stuck at "udhcpc: no lease, forking to background" just like here :

viewtopic.php?p=36854

So I got the idea that it was the USB init disk that was faulty, so I reflashed it :

viewtopic.php?f=76&t=3684

No much luck, still "udhcpc: no lease, forking to background", so I tried a different approach :

viewtopic.php?t=6433

Yet to write the IMG file, I used the Passmark's ImageUSB from :

https://www.osforensics.com/tools/write-usb-images.html

Yet still blocked at "udhcpc: no lease, forking to background" despite a lease having been granted (192.168.2.100) :
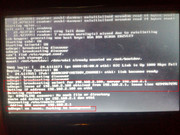
Image

I'm stuck, with 1 HD or not, the WEB interface isn't accessible anymore, despite working before.

Hope it helps to narrow down the issue.
Re: Instructions for Adding HDDs to RAID

Posted: 05 Oct 2024, 07:42
by Gremlin
Do you have more than 1 lan connection?
The 'forking' seems to appear to allow TNAS PC (or mobile) to make a connection.
I believe you said you had 'formatted' the drives. How exactly did you achieve this? Generally I have found that a plain format is insufficient. I use a 3rd party partitioning manager (on windows) and (a) delete all partitions; (b) change partitioning type (MBR -> GPT or vice versa); (c) change partitioning type again. This seems to ensure that TOS 'leftovers' are cleared out.
Have you actually looked at the contents of your drives? I suspect that at least one has retained TOS os data and is trying to re-establish coherence.
Just some thoughts.

Re: Instructions for Adding HDDs to RAID

Posted: 05 Oct 2024, 11:21
by TMzethar
wenuam wrote: 05 Oct 2024, 07:09
Regarding the issue you mentioned about not being able to successfully delete volumes and storage pools, there may be hidden processes that are continuously occupying volumes. Please refer to this to find out and deactivate them:
viewtopic.php?t=5955

Despite your attempts at a number of unrelated maneuvers, judging by the contents of the display, you have successfully turned on the USB boot system. Please use the TNAS PC search or type TNAS.local/ into your browser to find it.