Applicable Model: D5-300
Step 1: Get root privileges on Mac
1.1 Keep the device powered on and connect it to your computer;
1.2 Log in to macOS as a system administrator, Go to "Lauchpad > Others > Terminal", and click to run the "Terminal";
1.3 Enter command: sudo -i
1.4 Press Enter;
1.5 Enter your password, and press Enter (When you enter your password, your password will not be displayed).
1.6 When you see something like: xxxxxxxxx:~ root#, this means you successfully get the root permission;

Step 2: Install the new version of RAID Manager
2.1 Download the RAID Manager.
2.2 Double click to open TerraMaster RAID Manager_V1.0.14.app.dmg;
2.3 Select and right-click "TerraMaster RAID Manager" , click "Show Package Contents > Contents > MacOS >TerraMaster RAID Manager;
2.4 Right-click "TerraMaster RAID Manager", click "Copy";
2.5 Paste "TerraMaster RAID Manager" into the terminal window and press Enter;
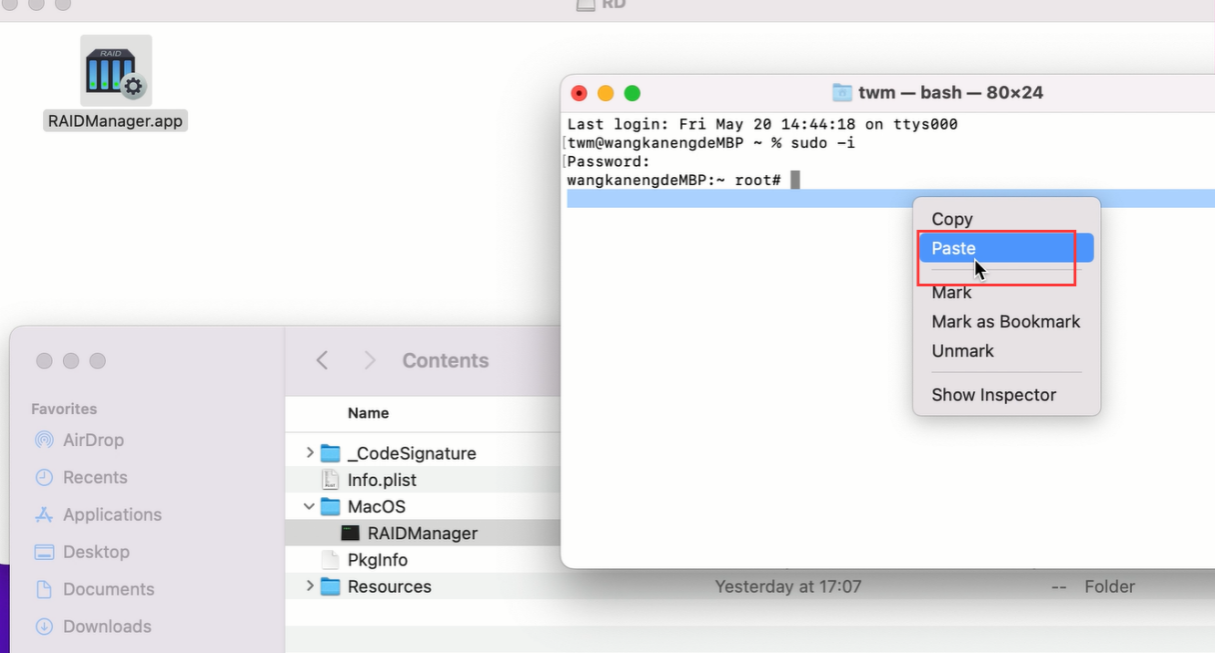
2.6 The RAID Manager interface will pop up;
Note: If you get a message that the installation is stopped because of security reasons, you need to go to System Preferences > Security & Privacy, and allow RAID Manager to run.
Video guide: https://terrahelp.oss-cn-hongkong.aliyu ... _guide.mov
Important Notice:
Since the D5-300 has been on the market for more than 7 years, the device hardware has been updated several times during the years. The older hardware versions are not compatible with macOS 11.x/12.x/13.x systems, which means that even with the latest RAID Manager program, you will not be able to manage the arrays on the device. Only the latest 3 hardware versions can support MacOS 11.x/12.x/13.x systems: B01-D5300NEW-S1, B01-D5300NEW-S2, B01-D5300NEW-S3; be sure to pay attention to which version your hardware belongs to.